Software Standardizes Measurement Communication
Efficient communication between disparate measurement devices and brands is the reason for PC-DMIS’s development. It is and continues to be driven and refined by users’ needs in the shop.
The field of quality control has grown dramatically in the past 5 decades. With improvements in manufacturing technology, mechanical components continue to be more complex with densely populated features. The need for dimensional control and tighter tolerances requires quality control solutions as advanced as the technology creating the parts. The hardware used to measure parts is only as good as the software controlling it. One software package that has evolved continuously to meet today’s manufacturing challenges is PC-DMIS from Hexagon Metrology (North Kingstown, R.I.).
PC-DMIS was developed in 1991 when William Wilcox and Mark Cluff decided to start a metrology software company. It was originally based on DOS and was developed on the premise that CAD, well on its way to becoming the de facto standard in manufacturing, should be leveraged to interface with metrology hardware. As the market embraced this new-found focus, the developers turned their attention to other benefits the software offered.
Facilitating a Common Platform
An underlying philosophy behind this communication standard is ensuring ease-of-use for operators. PC-DMIS can be installed on a range of metrology hardware from both Hexagon Metrology and other vendors. Users have the choice of equipping their coordinate measuring machines (CMMs) and portable CMMs from a selection of software modules for stationary CMMs (including PC-DMIS CAD and CAD++), PC-DMIS Portable, PC-DMIS Vision and PC-DMIS NC (for inspections on CNC machines).
PC-DMIS also interfaces with a variety of sensor options for flexibility within the organization. It facilitates the use of white light sensors on optical CMMs, laser scanners on stationary and portable CMMs, and analog scanning probes on stationary CMMs.
With installation possible on a variety of equipment, the software speeds the rate of data transmission between different locations in the shop. With more than 30,000 licenses in use worldwide, the software has the potential to also increase the rate of data transmission to different locations globally.
Many companies use a variety of metrology tools for manufacturing tasks or dealing with customers or vendors. PC-DMIS provides a common platform and language for all parties to use when communicating design intent. Because operators only need to learn the core utilities and features of the software to get started, the learning curve is low. After that, the operator needs to learn the nuances of each discrete metrology tool, such as a vision probe or through-the-lens laser.
“Companies don’t lose money in terms of needing to have someone trained to operate this system, and someone else trained to operate another system, creating specialists for a particular unit,” says Gary Hobart, Hexagon Metrology’s national sales manager – vision. “With a common software platform, it is easy for an operator to transfer from a tactile machine to a vision machine to a laser tracker, because training time and money is always hard to come by.”
Reducing Cost, Speeding the Process
Because the software has a short learning curve, users only need to learn core utilities to operate the shop’s various metrology machines. Moreover, implementation time dramatically speeds up once the plant has adopted PC-DMIS. Other software features speed up internal manufacturing processes by introducing automated inspection routines.
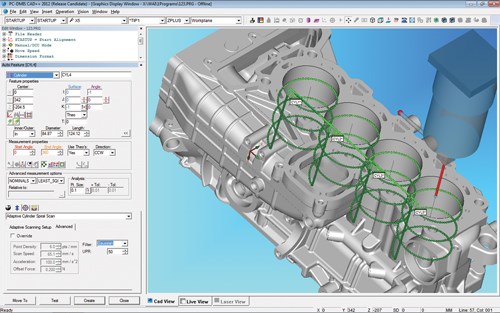
One such feature is the facilitation of processing optical measurement by providing CAD-based results. When parts are created in CAD, it is much more efficient to measure them in CAD. PC-DMIS Vision software enables live programming from the machine to compare measured values with nominal values of the machined part.
With the software playing a part in the vision world, 3D software with 3D capability has entered what was previously known as a 2D world. This advancement has ushered inspection into a new era.
Multi Capture has been implemented, which is a vision measurement technology standard that automatically finds multiple features that fit within the same field of view and capture their measurement data simultaneously in a single frame. Inspection time is optimized, improving part program performance and increasing throughput.
Another capability of this standard is its capacity to process scanned data. Scanned data, either via analog or laser generated, is gathered much more quickly than point-by-point probing. In some instances, customers have reported a 75-percent decrease in inspection times by implementing scanning in their routines. Those using laser scanners also have the option of creating a point cloud from the exported measurement data. Point clouds highlight out-of-tolerance features with a color-coded system that makes analysis-at-a-glance possible. Regardless of whether scanning technology is used or not, operators benefit from customized reporting, where only relevant features are pulled into the reports.
New features automate the inspection process further to save time. The Path Optimizer calculates the most efficient moves of the CMM to speed inspections. Clearance Cube assigns a protective virtual envelope around the part and guides the probe to avoid that area, decreasing the possibility of crashes. Change Manager is a function that updates changes to the CAD file in the inspection routine. It uses embedded geometric dimensioning and tolerancing (GD&T) to keep the entire file electronic, thereby saving revisions to blueprints and time spent communicating those changes.
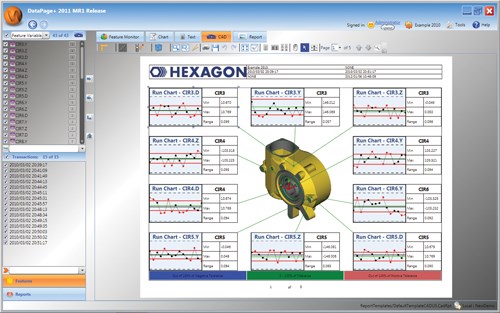
Datapage+, a software system that is part of the PC-DMIS family, is also streamlining the manufacturing process. Web-based visual statistical process control (SPC) integrated with CAD is at an operator’s fingertips. Datapage+ also allows the data to be imported from various hardware devices from CMMs to portable CMMs and even select hand gages.
Because the solution is Web-based, an inspection report can be generated and made available in real-time. The information can also be archived—a vital requirement for FDA approvals. Reports can be generated and scheduled anywhere in the plant or even anywhere throughout the world. Using Datapage+ and a mobile device, such as an iPad, manufacturing data can be gathered and analyzed live. Therefore, if there is a problem, the process is halted and the machine adjusted. This is a tremendous help in reducing scrap.
Measuring Complex Parts
PC-DMIS uses CAD tools that simplify difficult and time-consuming measurement tasks. It is also certified with NIST/PTB standards and is compliant with ISO, ANSI, FDA, DOE and DOD.
The mainstay in vision for the past 100 years has been optical comparators within the production arena. By placing an overlay of an image onto a screen, comparators provide a large field of view and a quick check to determine if the part matches the overlay. Comparators are limited to 2D comparisons, part profiles and back-lit shadow objects. In addition, the image is a lower resolution because of the higher field of view.
The advantage of using a vision machine instead of an optical comparator or digital optical comparator is that, although light travels in a straight line, it is similar to water coming from a faucet. As water comes out, if you put your finger in the stream, water wraps around it, therefore, changing the diameter, Mr. Hobart says. “On a vision machine, you can use top light where the light will still wrap around, but you’re not changing the diameter because it’s not actually influencing the size. The frame is still the same, so it’s far superior in terms of giving you that flexibility of measurement.”
Vision machines also allow for inspection directly on the major diameter by zooming in to a much higher magnification. This allows the operator variability where once the light was turned up to a higher level to try to obtain a better image. PC-DMIS has a built-in light tool, which recognizes if inappropriate light settings are being used and automatically adjusts as necessary.
When it comes to measuring round parts with varying diameters such as fasteners and screws, the benefit of having the CAD model, and in particular, being able to inspect direct to the CAD model, allows for measuring the parts in sections. With a fourth-axis vision machine, the part can be rotated to determine if the diameter changes. For companies concerned with measurement deviation, this capability can be automated into the part program.
For Small to Medium Shops
Though PC-DMIS has capabilities that benefit large multi-national corporations, it is also at home in small- to medium-sized businesses, as well. It brings the obvious benefits of a high level of quality assurance that any metrology software brings. However, its cohesive environment makes it especially useful as a common platform throughout the business, as well as throughout the supply chain. With the ability to transmit data throughout a supplier network, the communication standard can help smaller businesses stay competitive as they are able to quickly demonstrate compliance of quality standards that were once primarily the domain of larger firms. The support network behind PC-DMIS is in place. Small- to medium-sized businesses have the same opportunities to communicate with the large network of users and programmers as larger firms. Hexagon has metrology centers located around the country and globally to offer support on a local level. There is also a sizeable online community actively discussing topics of interest on the PC-DMIS forum.
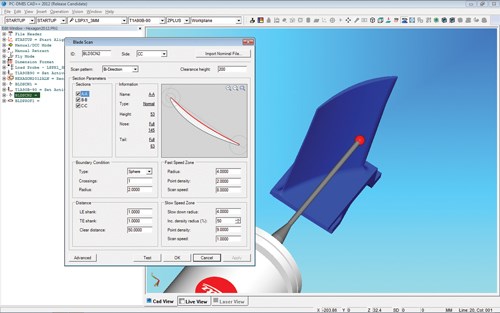
Additionally, the software was developed to be easily understood. This benefits smaller shops, which do not typically have the resources to dedicate to training and implementation issues. Plus, there are plug-and-play modules that allow the customization of software if and when a shop takes on new applications. Modules include PC-DMIS Blade, PC-DMIS Gear and PC-DMIS NC, among others.
The Future of PC-DMIS
In recent years, metrology has evolved in the shopfloor environment. No longer does a company necessarily need to depend on a dedicated quality control lab. Shopfloor-hardened CMMs are able to withstand the less-than-ideal environments they are placed in. That trend is being taken into account as the software continues to be developed to reflect the blurring of the line between manufacturing and measurement.
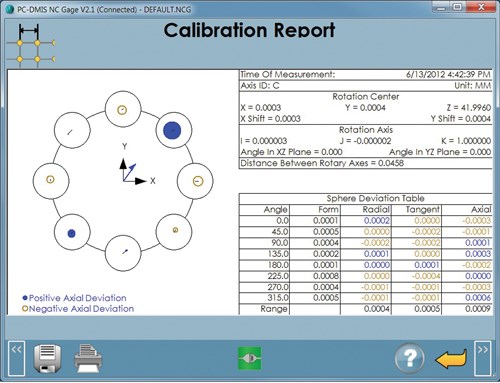
Besides driving shopfloor hardware, PC-DMIS’s NC Gage module is customized to the machine operator. Housed on the CNC machine, this module allows inspection routines to run before a part is completed. This gives a quick quality check before a part is removed from the fixture. From a CNC operator’s standpoint, the intuitive touchscreen and straightforward programming language allow inspection routines to be run without waiting for results from the quality lab.
Ken Woodbine, president of Hexagon Metrology’s software division, says, “We are aggressively addressing steps within the manufacturing process to empower a customer to cut costs, reduce scrap and overall improve their quality operations. We don’t see quality assurance as being separate from manufacturing, but rather an integral part in the total product life cycle management of upstream processes.”
Related Content
2023 Emerging Leaders Strengthen Their Staffs, Solve Problems
Superb critical thinking, top-notch leadership skills and a passion for building a strong team are a few of the common traits held by this year’s five Production Machining Emerging Leader award winners.
Read More4 Tips for Building an Effective Machining Apprenticeship Program
Developing the right apprenticeship program can be one of the best things a machine shop can do for itself and for the future of manufacturing. Here are key “do’s” and “don’ts” to follow.
Read MoreApplying a Healthy Approach to Employee Investment
Service Center Metals’ on-site health center offers its employees and their families free same-day health care and, in return, the employer is gaining many benefits including a healthier workforce and attracting potential employees.
Read MoreEmerging Leader's Dedication to Education
Instilling confidence throughout a shop floor can do wonders for company morale while increasing productivity.
Read MoreRead Next
Profiting with Shop Management Software
Once all employees can see how process changes can benefit them, implementation becomes easier and efficiency soars.
Read MorePredicting the ROI of Robotic Automation
Various methodologies paired with online tools can help small to mid-sized manufacturers determine how to predict and calculate the potential economic benefits of robotic equipment for their specific needs.
Read MoreThe Value of Swiss-Types Milling Rectangular Medical Parts
High-speed spindle technology was key to effective milling of small cardiac monitoring components complete on a CNC sliding-headstock machine platform instead of running them across two mills.
Read More

