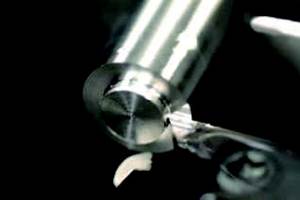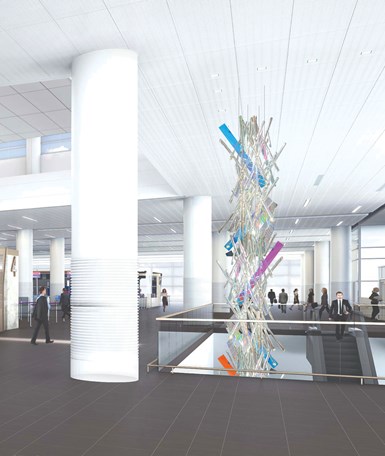
Renowned artist Gordon Huether required complex stainless-steel hardware to create a four-story, “live” glass sculpture for a new terminal at the Salt Lake City International Airport in Utah. The resulting sculpture assembly, using the hardware Ansonia Manufacturing provided, enables the sculpture to rotate on axes to get the look and flow of light. (Photo credit: Gordon Huether Studio)
It should come as no surprise that the grape-filled valleys in California are rich with art, artists and studios. Despite the culture surrounding the multitude of wineries, the only machine shop in the town of Sonoma, California, Ansonia Manufacturing, remained untouched by the art industry. Until recently.
The four-person shop, owned by husband-and-wife Andrew and Jamie Storck, has milling, turning, broaching and thread-rolling capabilities and serves a variety of industries, including aerospace, medical, military, robotics, food and wine. A few years ago, Jamie’s parents, who are glass sculpture collectors and enthusiasts, became aware that renowned artist Gordon Huether required complex stainless-steel hardware to create a four-story, “live” glass sculpture for a new terminal at the Salt Lake City International Airport in Utah. Based on a recommendation from her parents, Huether requested a visit with the job shop.
When the Storcks met with the artist, they found out that this was one of the first times that a live sculpture of his involved visible, machined hardware. They say that Huether’s early designs called for the hardware components to be made by welding separate parts together. Jamie asked him, “Why pay someone to weld parts together? We can machine each component in one piece and make them look more appealing by adding curves and improving surface finishes,” she said to him.
In fact, this job would make use of an Okuma LB 3000 MWY turning center with subspindle and live tooling, purchased for a project that was canceled by the customer. Originally concerned that the precision machine would sit unused, the shop now had the chance to use it on the sculpture hardware.
“Why pay someone to weld parts together? We can machine each component in one piece.” - Jamie Storck
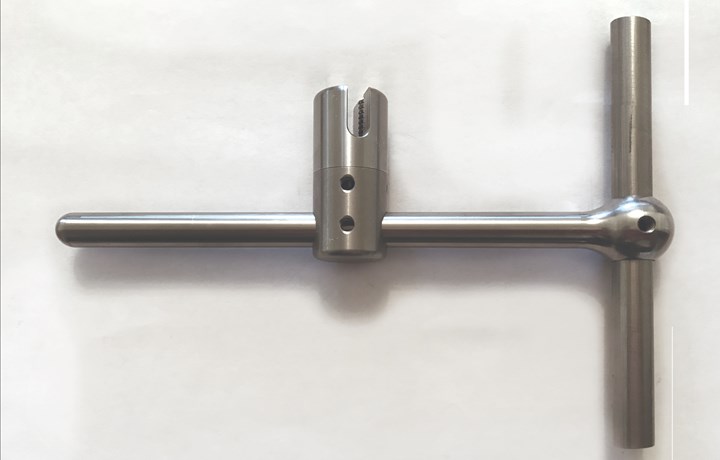
However, one of the seven parts required for the sculpture hardware job proved particularly challenging. Called a “lollipop,” this 7-inch-long, 304-stainless-steel component featured a 7/16-inch-diameter shaft and a 7/8-inch sphere on one end with a through-hole and a smaller tapped cross-hole to lock in the swivel component that installs in the through-hole.
The shop was faced with two options. This part could be turned on a lathe then taken to a mill to machine the through- and cross-holes. Or, it could be machined complete on the LB 3000 if they added a boring head to the machine and created macros to turn the part in a “triple pull” method for increased rigidity when turning the relatively long and skinny parts. They chose the latter.
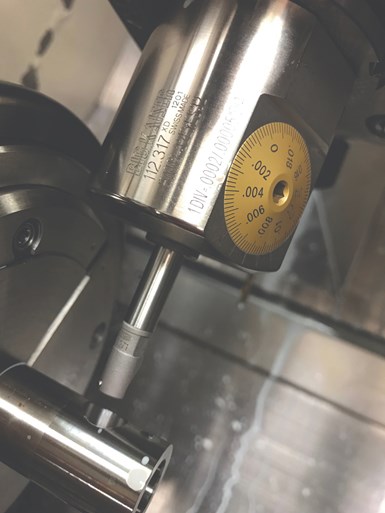
The boring head on the Storck’s Okuma LB 3000 MWY turning center with subspindle and live tooling offers versatility to perform boring operations on a variety of jobs including the parts for the live sculpture. (Photo credit: Ansonia Manufacturing)
Pull It Together
The lollipop part was machined from an 8-inch-long blank. Because the Okuma couldn’t feed 8-inch bars through at once, the shop applied the triple pull method to eliminate issues and maintain bar rigidity. A blank was pushed through the LB 3000’s main spindle and chuck by a bar feeder, and the machine’s subspindle served as both a live center for support and a bar puller. Turning on the main spindle was performed in three different stages to provide rigidity during the operation. After a few inches was turned, the subspindle clamped the part, the main spindle chuck opened, and the subspindle pulled the part further into the workzone for additional turning. This occurred three times until turning of the shank and half of the sphere was completed. Because the machine’s CNC would typically think that three parts were completed because the chuck opened three times, a custom macro was created to equate three chuck openings to one completed part.
After that, the subspindle clamped onto the workpiece and the workpiece was parted off from the rest of the blank. The other half of the sphere was then turned and backworking for the through- and cross-holes ensued. The bar feeder pushed another blank partially into the workzone to enable turning of the next part, which also ejected the remnant from the previous bar.
The Storcks knew that a boring head would be needed to machine the sphere’s through-hole. They had used boring heads on their mills, but not on a live-tool lathe. Some boring heads for lathes attach to the live-tool station using an ER collet. The issue with this, they say, is that this causes the boring head to extend far from the face of the turret station, which reduces rigidity and can cause chatter. At an International Manufacturing Technology Show (IMTS), they discovered that the EWN2-32E from Big Daishowa attached directly to the female threads on LB 3000’s live-tooling station without the need for a collet or collet nut. As a result, the boring head’s insert was closer to the face of the turret station for better rigidity. They had found the answer to their problem.
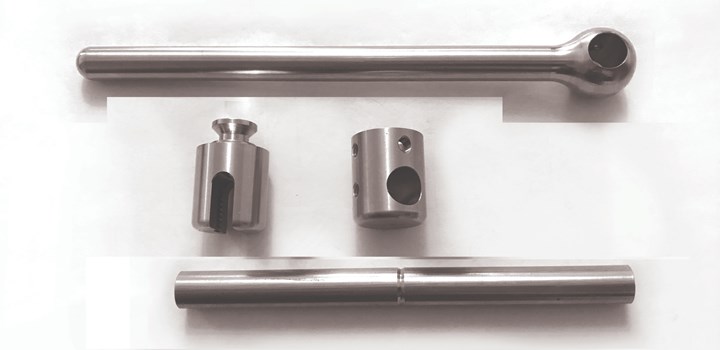
Besides turning and boring the cross-hole for the lollipop part, Ansonia Manufacturing drilled and tapped a 1032 cross-hole to lock in the component that goes through the hole. A copy tool with a 25-degree diamond insert cut from the 7/16-inch-diameter half around the part in a 270-degree arc to finish the 7/8-inch-diameter lollipop head. (Photo credit: Ansonia Manufacturing)
To set up the boring head diameter for this job, the head was installed in one of the shop’s milling machines. A touch-trigger probe was used to measure the head diameter to get it in the ballpark. Then, they attached the head to one of the LB 3000’s live-tooling stations and performed test cuts to dial-in the diameter.
“After we installed the boring head and started running parts, we never had to adjust the head’s diameter or change the insert for the entire 1,200-part run,” Jamie says. “That certainly speaks to the quality of this boring head.”
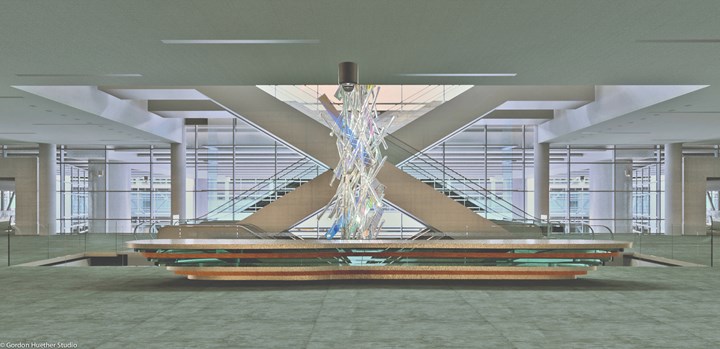
“There’s a framework on the ceiling and a framework on the ground connected by taut wire cables. The whole assembly we made allows the artist to rotate the glass on any axis to get the right light reflection, look and spacing. All of the glass hangs on the myriad of hardware and cables strung between the ceiling and the floor,” Andrew Storck says. (Photo credit: Gordon Huether Studio)
Since that project, Ansonia Manufacturing has had multiple applications for both the boring head and the LB 3000. The boring head offers a diameter range of 2 to 32 mm, which is helpful because the Storcks’ business is a job shop, and this offers versatility to perform boring operations on a variety of jobs. In fact, Huether has become a repeat customer for Ansonia Manufacturing, and what started out as a live-sculpture hardware redesign on a napkin became a new industry of enterprises for the shop to aid and explore.
Related Content
Tool Path Improves Chip Management for Swiss-Type Lathes
This simple change to a Swiss-type turning machine’s tool path can dramatically improve its ability to manage chips.
Read More4 Strategies for Managing Chip Control
Having strategies in place for managing chips is an important part of protecting the production process, from tool life to product quality.
Read MoreBroaching Tool Technology For Lathes Used to Slot Inconel Parts
This shop finds value in using an indexable-insert-style broaching tool to create blind-hole slots in heat-treated Inconel aerospace parts on a CNC lathe.
Read MoreThe Ins and Outs of Inserts
Understanding how inserts are made provides valuable insight into how their performance can be optimized.
Read MoreRead Next
Do You Have Single Points of Failure?
Plans need to be in place before a catastrophic event occurs.
Read More5 Aspects of PMTS I Appreciate
The three-day edition of the 2025 Precision Machining Technology Show kicks off at the start of April. I’ll be there, and here are some reasons why.
Read MoreSeeing Automated Workpiece Measurement in Real Time
User-friendly inspection software for CNC machining centers was shown at IMTS 2024 monitoring measurements between and after machining while performing SPC based on recorded measurement values.
Read More


.jpg;maxWidth=300;quality=90)


