Maximizing Metrology’s Flexibility
Simplified and more direct measuring and inspection functions speed time to market while handling a wider range of parts and surfaces.
Share
Every manufactured part has its own range of inspection or reverse engineering issues. Large or small, simple or complex, parts manufacturers may face a combination of planar and freeform surfaces, intricate radii, highly reflective surfaces, or complex features, such as those found in threaded shafts and Swiss-type parts. Inspecting these features could include such tasks as comparisons of scanned point clouds to CAD models, updating designs, creating CAD models for reverse engineering or rapid prototyping tasks, and many more.
Manufacturers are faced with a growing number of inspection equipment choices, such as fixed CMMs, portable arms and laser scanners, that can be customized to individual production requirements and retrofitted to existing CMM or articulated arms. In addition to measuring functions and accuracy, some situations are demanding fully automated scanning and report generation, including inputting data, providing measurements, aligning components for the best fit, using virtual probes for identifying and measuring deviations and providing multiple templates for easy to use visuals and tabular data. While many choices and claims vie for attention, it pays to keep in mind some straightforward goals: simplified and more direct measuring and inspection functions that speed time to market while being able to handle a wider range of parts and surfaces.
Common Sense Checklist
Evaluating what metrology solution is right for a particular shop involves satisfying many, if not all of the following common-sense business concerns.
- Accuracy. There’s no point in beating around the bush. What is the accuracy threshold the shop and its customers will be demanding now and in the foreseeable future?
- Measuring volume. What parts demand measuring and inspection—micro parts, car panels or in between? Do parts need to be measured on the factory floor, in-process, or delivered to a metrology department with a controlled-environment?
- Automation. Is a separate metrology lab and/or a production inspection solution required as parts are being made? Will a portable solution bridge the gap, if needed?
- Data acquisition speed and software compatibility. The nonstop growth in computing power has made many advances in inspection possible. Is report data available in easily understood forms? Can reporting be completed offline, leaving articulated arms or CMMs dedicated to inspection tasks?
- Cost.
In general, an overall inspection system is only as accurate as both the scanning option and the device positioning the scanner. Traditional CMMs offer good inspection results and have been successfully tied into selected production automation scenarios. CMMs also present limitations in the area to be measured or in portability articulated arms can be ideal for large parts. Both arms and CMMs may present options in data acquisition devices, for example, scanners and probes.
Options are Expanding
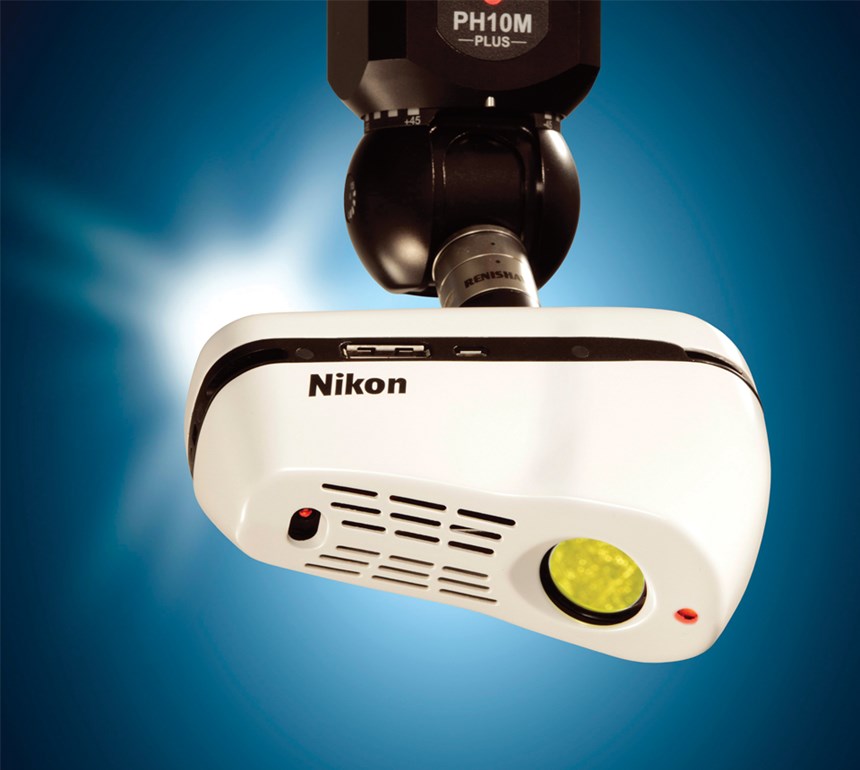
Many combinations of these machines are being introduced, which expand the capability of inspection departments. Nikon Metrology’s MCAx Manual Coordinate Measuring Arm is a portable seven-axis measuring arm that can be partnered with the company’s ModelMaker, MMDx, or MMCx digital handheld laser scanners and Focus 10 handheld scanning and inspection software.
The MCAx arm can be equipped with a range of probing systems for laser scanning, touch-trigger measurements and continuous scanning. This high precision portable scanning solution reaches better than 50 microns of measurement accuracy. These seven-axis arms range from 2.0 to 4.5 meters and include infinite rotation of the principle axes. Absolute encoders are standard, as well as the locking counterbalance feature. Base options include bolt-down base plates or a magnetic base, WiFi, battery and probes.
It pays to keep an open mind regarding data acquisition (laser scanner or probe) and positioning device (CMM or articulated arm). The possibility of new combinations or retrofitting existing systems with new components continues to grow. And many former limitations are being shredded by new developments. With laser scanning, for example, even complex 3D castings, production dies, turbine blades, cell phones or Swiss-type parts can be scanned in a matter of minutes.
One modern development has been inspecting a component’s 3D CAD model to save time and improve efficiency. “Inspecting CAD and 3D is definitely a ‘checklist item,’” says Mike Provenzano, applications engineer for vision products at Nikon Metrology in Brighton, Michigan. “If you don’t have it, you’re off a customer’s checklist.”
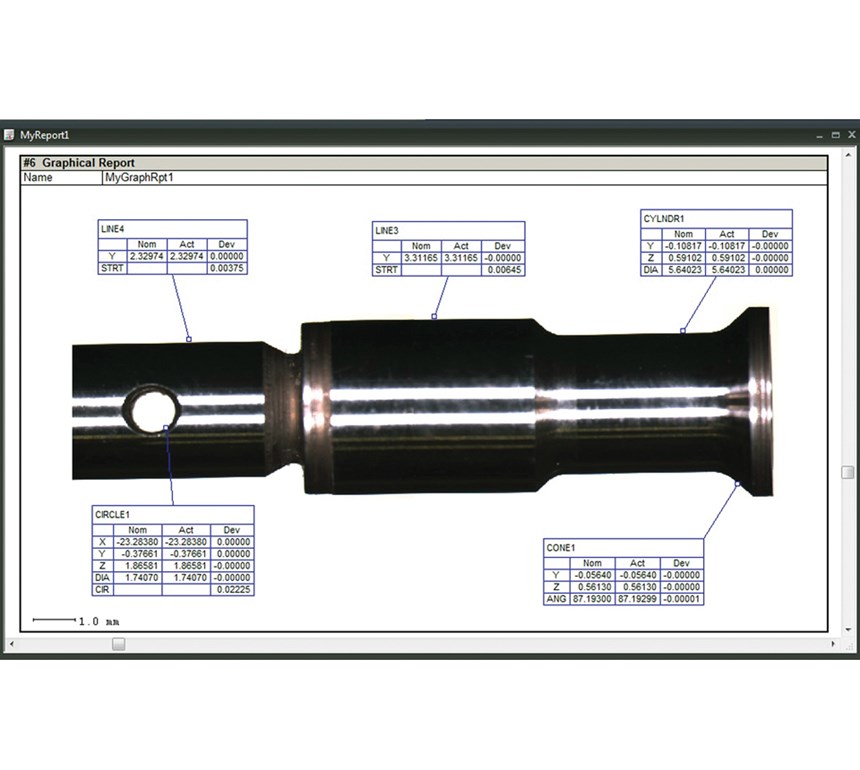
Nikon Metrology’s new CMM-Manager 3.5 for Nikon’s iNexiv vision measuring equipment has a user-friendly interface and works with vision measuring, autofocus laser scanning, rotary indexing, and touch probing to provide a 3D multi-sensor system for both physical products and 3D CAD models.
“CAD is now an integrated part of product measuring and inspection,” says Nate Frost, Nikon product manager. “CAD is important because it opens up opportunities to take programming and inspection offline and save significant time, bringing new products to market.”
Historically, vision hardware technology has outpaced software development. “Previous software versions assumed you were working in a 2D template on an X-Y workplane,” he says. The latest CMM-Manager can import 3D CAD models and pick features to create automatic probe paths for both vision and tactile measuring. It can align any part regardless of part complexity or geometry. Simulations can be run, and inspection results can be verified in real time. In fact, the more complete the CAD model, the more efficient the inspection process becomes.
“With vision, autofocus laser, rotary indexer, and tactile input, we can even measure features and geometry you can’t see,” Mr. Frost says. 3D input also can be expressed as 3D output in the form of charts and models as opposed to long tables of X-Y data, making reporting and decision making much faster and easier.
It is an exciting time to be considering new metrology options. The right configuration and combination can yield groundbreaking measurement and inspection performance.
Alex Lucas is the business development manager/scanning products for Nikon Metrology Inc. .
Related Content
Precision Machining Technology Review: December 2023
Production Machining’s December 2023 technology showcase includes some of the latest technology from Sandvik Coromant, Nikon Metrology, The L.S. Starrett Co., Walter USA, Kennametal and SolidCAM.
Read MoreShop Finds Value in Simple CMM Programming
Icon-driven programming enables all shopfloor personnel to perform CMM inspection, not just those in the quality department.
Read MoreThe Value of CMM Controller Retrofits
In this case, new controllers for two coordinate measuring machines — one 26 years old — with new programming software offers the possibility to enable multisensor inspection of critical, turned aerospace components.
Read MoreHow Well do You Know Granite Surface Plates?
Here are some tips for choosing, maintaining and customizing a granite solution that will best meet your shop’s particular inspection needs.
Read MoreRead Next
5 Aspects of PMTS I Appreciate
The three-day edition of the 2025 Precision Machining Technology Show kicks off at the start of April. I’ll be there, and here are some reasons why.
Read MoreDo You Have Single Points of Failure?
Plans need to be in place before a catastrophic event occurs.
Read More


