Coordinate measuring machines (CMMs) are not new to medical device manufacturers. These powerful machines are critical to a quality assurance program that guarantees consistent, high-quality products.
But with great power comes great responsibility to be in compliance. Even pros with years of quality experience can still struggle with satisfying the validation requirements of the U.S. Food and Drug Administration (FDA).
Documentation is the goal of validating metrology systems for FDA compliance. The FDA wants evidence that manufacturers in the medical device industry can back up claims of parts and components that meet predetermined requirements and quality attributes.
How can a medical device manufacturer determine that CMM equipment and metrology software meet these FDA validation requirements? Trick question! CMM equipment and software cannot be validated; validation must address intended use.
Intended use refers to how a software’s programming language is used to write a program or measurement plan for a workpiece. The programming language itself cannot be validated because no official organizations — such as the National Metrology Institute of Germany (PTB) or National Institute of Standards and Technology (NIST) — can accommodate the specificity and context of each manufacturers’ hardware, environment and personnel.
Manufacturers cannot rely on official standards or even CMM suppliers. They need to be able to create measurement plans that comply with FDA regulations, including 21 CFR Part 11 and 21 CFR Part 820.
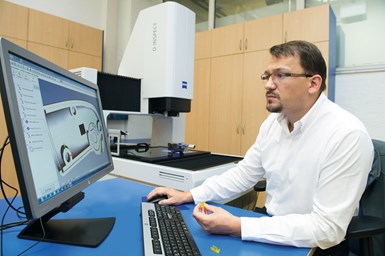
Once manufacturers realize that CMMs and software cannot be validated to FDA requirements, they have gained a new vision of quality. Photo Credit: Zeiss
Creating robust, valid measurement data means considering the intended use of each unique application. The CMM and its surroundings (the CMM system) must be separated from the program and the part-specific items (the inspection process) and then validate both.
The CMM system is more than just the CMM itself and includes the following:
- Metrology software, such as Zeiss Calypso universal software, for dimensional metrology applications
- Environment, including temperature and humidity control
- CMM users (such as operators and programmers) and their skills and training
A well-defined user requirement specification (URS) and installation qualification/operational qualification (IQ/OQ) plan can help in validating both CMM systems and the inspection process. These protocols are key aspects of the V-Model for validation, which is used in the medical, pharmaceutical and software development industries.
The URS is part of the left-hand side of the V-Model which represents user requirements for a workpiece on a broad, organizational level, such as design and planning activities. After the implementation process, IQ/OQ are part of the right-hand side of the V-Model, which includes the validation, testing and qualification activities to determine if the user requirements were satisfied.
Validating both the CMM system and Inspection Process might have you seeing double — double V, that is. Zeiss Industrial Quality Solutions is making the validation model clearer with a V for CMM system and another V for the inspection process. This clear validation model threads the eye of the needle, validating both aspects of the quality system. When executing this high-quality approach, it is vital the CMM system is up and running, accepted and validated before beginning to validate the inspection process.
The first step is knowledge. Once manufacturers realize that CMMs and software cannot be validated to FDA requirements, they have gained a new vision of quality. From customers new to CMMs to veterans with protocols in place, this forward-looking perspective will help solidify delivering the best possible medical devices.
About the Author
Scott Lowen has over 25 years of experience in the metrology industry. He has been the Software Product Manager for Zeiss Industrial Quality Solutions in North America for 10 years and leads a team of experts to bring medical industry solutions for quality assurance to market.
Read Next
5 Aspects of PMTS I Appreciate
The three-day edition of the 2025 Precision Machining Technology Show kicks off at the start of April. I’ll be there, and here are some reasons why.
Read MoreA Tooling Workshop Worth a Visit
Marubeni Citizen-Cincom’s tooling and accessory workshop offers a chance to learn more about ancillary devices that can boost machining efficiency and capability.
Read MoreDo You Have Single Points of Failure?
Plans need to be in place before a catastrophic event occurs.
Read More


.png;maxWidth=300;quality=90)


