It is not uncommon to see lasers in use in a machine shop. Examples include laser interferometers for measurement and calibration of machine tool motion systems; and laser tool setting systems to measure tools on a machine and detect broken tools.
Recently, laser technology has been integrated to measure precision workpieces on some of Studer’s (a United Grinding brand) external and universal grinding machine models. Over the past 10 years, the company has been developing this technology that it used for experimental measuring of grinding wheels. Realizing its potential for grinding machines, in 2020 Studer and the laser manufacturer added improved lenses and other necessary equipment suitable for grinding and finally launched what it calls LaserControl — machine-integrated laser process measuring technology.
LaserControl offers many benefits such as precision workpiece measurement that reduces production costs, increases the ability to measure a variety of part sizes, improves part quality and employs software that records all measurements. Plus, systems like these are generally easy to use and produce data more quickly than their analog counterparts. In addition, laser measurement is a noncontact measurement method, therefore it does not harm the material being measured. When there is no contact, there is no wear or damage, including to the measurement device itself such as a probe or stylus that is used on an analog system.
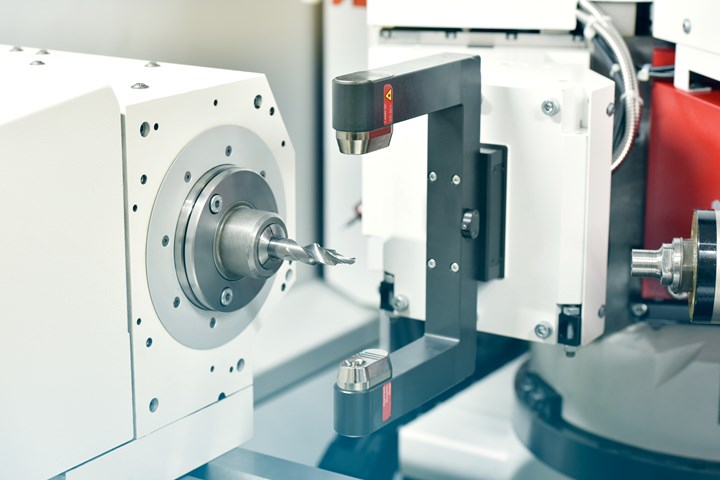
Shaped like the letter “U” positioned on its side with the laser emitter and receiver facing each other on the open end (see photo below), the laser gage is attached to the grinding machine turret wheelhead, thus moveable in the X and Z axis. It comes into position by moving the X axis of the machine and indexes away when the machine is grinding. The laser head moves over the part to position for measuring until the laser beam is broken by the periphery of the part, taking the first side’s measurement and registering the start information. The laser head continues to move forward over the part until the laser beam is beyond the part and is no longer broken. This then gives the information on the part size. (The machine’s high-resolution linear glass scale measures the distance from measuring beam interruption to measuring beam not interrupted.) The measurements are registered in a table on the operator screen.
Shaped like the letter “U” positioned on its side with the laser emitter and receiver facing each other on the open end, the laser gage is attached to the grinding machine turret wheelhead, thus moveable in the X and Z axis. Photo Credits: United Grinding/Studer
The measurement process can take anywhere from 10 to 60 seconds, depending on the size of the part and the type of measurement being taken. The system has a repeatability of +/-1.5 microns.
Although extensive, the user-friendly Studer software program for the system enables grinding machine operators easy measurement programming that does not require much skill. The software automatically records the measured values after each measurement cycle, and data can be exported to a spreadsheet for further evaluation. Data can be printed out if desired.
Here are some key points about the Studer LaserControl that are helpful to understand before deciding if this technology is advantageous for your application.
Not like typical in-process gaging systems. Many in-process measurement systems will measure while the machine is cutting/grinding. The LaserControl’s closed-loop system, however, does not measure while the grinding process is taking place, but instead measures after the grind or in between grinding processes, interrupting the grind when multiple measurements are done on one workpiece. By stopping grinding temporarily, grinding fluids and emulsion that are not suitable for the laser are avoided. To clean off the coolant, chips and other machining residue from the workpiece prior to measurement, the LaserControl applies its blow-off system with integrated air nozzles immediately prior to measuring.
Designed to measure multiple diameter sizes and complex parts. Because the system is attached to the grinding wheel turret, it is moveable around the workpiece. Therefore, it is designed to measure external diameters as small
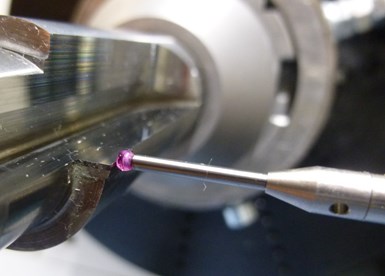
Probing is a measuring option in grinding machines, but the process risks damaging the probe and the cutting edge of the tool being ground.
as 1 millimeter to as large as 100 millimeters, as well as complex parts. Typical measurements include not only large, non-interrupted workpiece diameters and length contours but also interrupted diameters such as shafts with splines or grooves, cutting edges of tools and tool flutes.
Unconventional setup. Unlike other gaging systems, this laser measurement system does not require a mechanical setup. The machine operator tells the system’s program which points to measure on a workpiece via the machine control. So, the operator can program the machine to measure any point of the workpiece that is needed for data collection. This simple setup saves time compared to a conventional physical setup that often requires a more tedious setup of a gage on the diameter or lengths that will be measured.
Especially useful for measuring cutting tools on the OD. Although LaserControl presents many benefits for many grinding applications, it is not designed for every workpiece. For instance, it cannot measure IDs and it is not ideal for high-volume production because even this in-machine measuring process slows down cycle times. However, it is well suited for OD measurement on very hard material cutting tools with high precision complexity. Aerospace parts commonly benefit from this type of measurement system, too.
United Grinding/Studer | grinding.com
Related Content
T.J. Davies Retention Knobs Harden Over Time
Each retention knob is magnetic particle tested and pull tested to 2.5X the pulling force of the drawbar it is designed for.
Read MoreForkardt Hardinge Swiss Workholding Provides Reliable, Consistent Performance
The company’s Swiss collets are designed to securely hold parts without marring surfaces, minimizing vibration to ensure smoother machining, enhanced accuracy and extended tool life.
Read MoreSandvik Coromant Inserts Provide Stable Turning of Aerospace Components
The new insert grades GC1205 and GC1210 cover a large application area within last-stage machining and intermediate-stage machining when turning aerospace engine components.
Read MoreThe Value of Mass Finishing, Shot Blasting for Aerospace and Medical Applications
The choice between mass finishing and shot blasting for CNC-machined parts depends on the specific requirements of the application.
Read MoreRead Next
Automated Inspection on the Shop Floor
Most machine shops understand the value of automation when it is applied to such operations as turning, milling and grinding.
Read MorePreparing Tool Grinding Machines for IoT
Internet of Things (IoT) doesn’t require scrapping existing tool grinding machines, but investing in new technology, such as communication networks and automation, is necessary.
Read MoreGaging’s Value for Effective Unattended CNC Machining
Process control is a bigger deal for high-volume CNC machining operations to eliminate scads of scrap/rework because a problem was not identified early on.
Read More


.jpg;maxWidth=300;quality=90)


