The Case For Process Monitoring
This article looks at new deveopments in process monitoring for production machining applications.
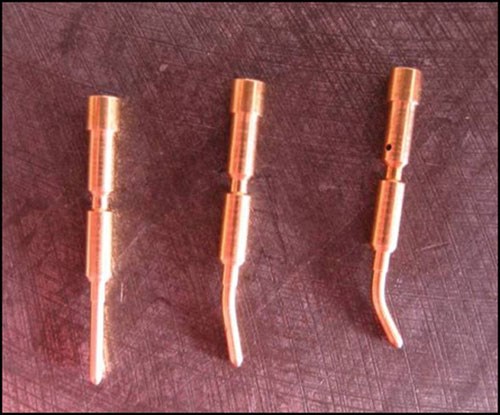
Unfortunately it’s not important how many good parts were delivered—only the bad ones count. Process monitors catch poor quality production parts in process, eliminating scrap and the need for costly 100-percent inspections post production.
Process monitors also protect machine and tools from excessive damage, thereby reducing operating costs and increasing machine uptime. And because the machine is protected, it can run untended, increasing effective manufacturing capacity and staff efficiency.
The pressures on subcontractors and manufacturers are greater today than they have been any time in the past. Part tolerances continue to tighten unabated because of the relentless miniaturization of
technologies.
At the same time the market is demanding shorter lead times and shipments with zero defects. It has become commonplace to include penalty clauses in contracts if these stringent demands are not met.
Guaranteeing quality through 100-percent inspection post production is costly and basically a non-value-added activity, which is compensating for uncontrollable changes that occur in the machining process over time.
Today’s lean Six Sigma market is unwilling to pay for such non-value-added process steps, rather advocating to “build quality into the process,” so defects are not passed on and waste is eliminated. This is precisely what process monitors do.
How It Works
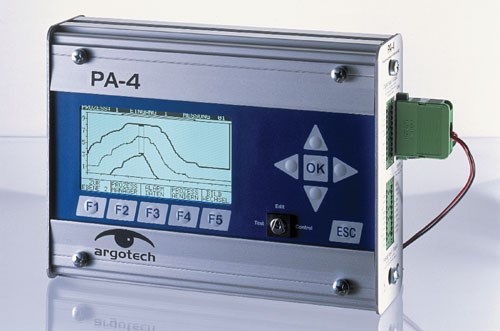
Process monitoring systems measure the machining process real-time through a number of strategically placed sensors on the production machine. The sensor input is continuously compared against a self-learned “fingerprint signature,” which represents a good production cycle. When a deviation from standard exceeds the pre-set tolerance limit, an alarm is generated and production shuts down.
Charting the sensor signal from cycle to cycle will reveal the tool wear over time. This wear can also be enveloped, allowing the user to maximize each tool’s life, reducing unnecessary costs from inspections or premature tool
replacements.
Some advanced systems also include in-process dimensional checks (5-micrometer accuracy), performed through non-contact sensors. One of the most common problems is that of short parts. The bar is not clamped properly and then pushed back during the machining process resulting in a part that is too short. The part is measured in process on its critical dimension(s) and sorted automatically if it doesn’t meet specification. No extra process step and production can continue without any lost time.
Applicability
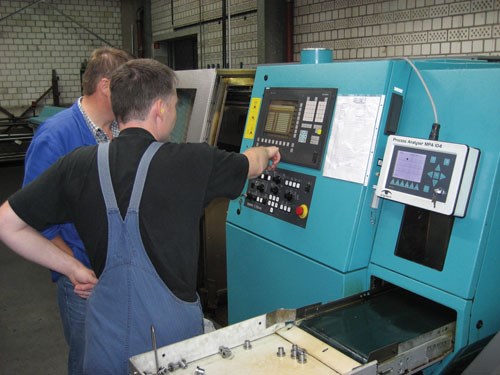
Process monitoring solutions can be implemented on almost any production machine; critical is the available space to mount the sensors. Ideally a free M-function is used for each sensor mounted, but the system can also be synchronized with other codes—for example, the coolant activation/deactivation cycle. The monitor’s output relays can activate to the machine lights, feed stop, emergency stop and/or the sorting slide.
Critical to understand is which type of sensor to use to monitor the process. This has to be accessed on a machine-to-machine basis and is, to a degree, dependent on the material(s) being machined and cutting tools used.
Preference is given to monitoring through power consumption, as this sensor is mounted outside the machining area. Power sensing, however, can’t always be used, especially with combinations of large motors and small drills. The process also can be monitored, then, through acoustic or force sensors.
Return On Investment
Process monitoring has a very good return on investment. Most users of process monitoring fall into one of two categories: high volume producers who need to produce as efficiently as possible; and producers of high value items, which tend to use expensive tooling and materials.
User feedback shows that for the right applications the typical payback period for a system is usually between 6 and 12 months.
Here are some of the main reasons to invest in process monitoring:
• Eliminate faulty production: The most common use of process monitors is to eliminate faulty production. This eliminates costly sorting of the produced batch after the fact. Personnel can be deployed more effectively preparing the next job, rather than monitoring the quality of ongoing production.
• Reduce tooling costs: Process deviations caused by tool breaks are detected instantly, triggering an audio/visual alarm and the immediate cessation of production. Potential follow-up tools are saved from crashing into the workpiece. Tooling costs are also reduced because of extended tool life, less unnecessary replacements, checks and or tool maintenance with the help of trend analysis.
• In-process quality control: The process monitor is used to measure one or two critical dimensions of the part during the machining process and to sort those parts that are found to be outside a preset tolerance limit. Quality control occurs in-process without lost production time and without expensive post-production measurements and sorting.
• Increase capacity or enable unmanned production: Production tends to get interrupted during breaks and shift changes. With process monitors, production can continue uninterrupted during these times, effectively boosting production capacity by more than 10 percent, without having to invest in costly production machines.
• Spindle monitoring/crash protection: Others use process monitoring to enable unmanned night shift production without the worry of something potentially going wrong. Machine repairs not only cost valuable production capacity, but the repairs themselves often cost a lot of money. A tool breaking can cause substantial collateral damages to the machine as will faulty programming or accidental spindle overloading.
The instantaneous reaction (typically less than
1 millisecond) to an abnormality picked up by a process monitoring system will substantially reduce such potential damages. Think of it as an automatic braking system for the machine.
In-process sensor technology is a cost efficient means to increase the production capacity of existing capital equipment by producing quality parts more consistently. Automating machine monitoring frees up operators to perform other more value-added activities in the shop.
Related Content
Strengthening Manufacturing Workplaces Through Active Listening
A good strategy to weather the storms of manufacturing market upheavals and unpredictable factors is to commit to continuous, active employee listening.
Read More6 Tips for Training on a Swiss-Type Lathe
There are nuances to training a person to effectively operate a Swiss-type lathe. A shop I visited a while back offers some suggestions.
Read MoreEmerging Leader's Dedication to Education
Instilling confidence throughout a shop floor can do wonders for company morale while increasing productivity.
Read MoreCNC Machine Shop Employment Positions to Consider Beyond Machine Operators
Many machine shops have open machine operator positions to fill. But does it make sense for shops to also seek automation engineers, IT managers and assembly personnel?
Read MoreRead Next
Reliable Monitoring For Small Tools
Continuous developments in sensor technology for machine tool monitoring open new possibilities and solutions for in-process tool breakage and tool wear detection. This article looks at effective ways to approach the problem of in-process tool monitoring.
Read MoreA Tooling Workshop Worth a Visit
Marubeni Citizen-Cincom’s tooling and accessory workshop offers a chance to learn more about ancillary devices that can boost machining efficiency and capability.
Read More5 Aspects of PMTS I Appreciate
The three-day edition of the 2025 Precision Machining Technology Show kicks off at the start of April. I’ll be there, and here are some reasons why.
Read More


.jpg;maxWidth=300;quality=90)


