When The Bore Needs More
Somtimes high precision is mandatory. This artilce looks at honing as a process to meet tight specs.
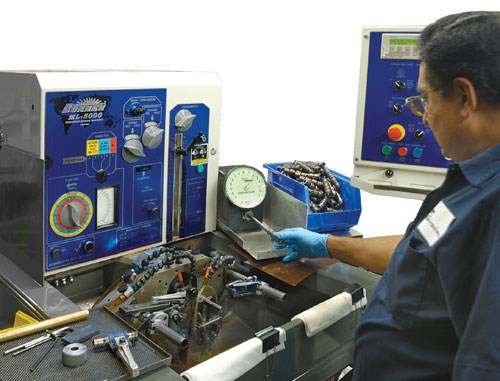
A new generation of honing technology is playing a vital role in improving product performance for fluid power components, providing manufacturers a unique ability to size and finish valve bores precisely, with exceptionally high Cpk(process capability) levels. The new honing technology, known as precision bore machining, can control bore size with quarter-micron accuracy (0.00001 inch), can correct geometric errors in the bore and can produce a specific surface finish with lubrication and seal-enhancing properties.
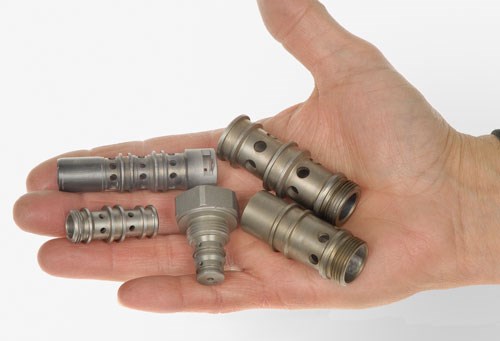
What does this mean in terms of performance in a cartridge valve? Conventional honing straightens a valve bore and precisely sizes it. This allows reduced clearance between the bore and mating parts, significantly reducing valve leakage. The tighter fit helps lower hysteresis and allows higher operating pressures.
Finally, honing creates surface finishes that wear at a slower rate to enhance valve life. The crosshatch finish left by conventional honing improves the uniformity of the lubricating film between sliding parts for more consistent performance, especially in adverse operating conditions.
Conventional honing is an abrasive machining process whereby a tool with expanding stone assemblies rotates in the cylinder bore while the tool or the part reciprocates rapidly during the process. A conventional honing tool may contact the entire length of the part’s bore, giving this process a unique capability to correct geometric error in the bore shape. Honing generates little heat and stress, so the surface integrity of the bore is excellent and can be finished to a specified level of roughness.
It may seem a contradiction, but attaining performance enhancements with honing actually lowers costs for the valve maker and can create opportunities to offer longer product warranties.
Any valve manufacturer can purchase basic screw machined components from high-quality vendors, but tolerances for these parts are rarely “state-of-the-art” precise. A bore tolerance of 0.002 inch (0.05 mm) is considered acceptable by most machinists, while honing produces bore tolerances of less than 0.00005 inch
(< 0.0013 mm).
In terms of the valve manufacturing process, various hole-making operations, such as boring, drilling and reaming, are capable of producing excellent tolerances, but when a manufacturer requires a high process capability—such as 1.33 Cpk—for quality purposes, the acceptable tolerance level must shrink to meet this.
For rule of thumb purposes, when the target is 1.33 Cpk, manufacturers find they have to hold about 75 percent of the print tolerance; at 1.67 Cpk, it drops to about 60 percent of tolerance, and the average of the measurements needs to be targeted very tightly on the mean of the tolerance. Holes produced satisfactorily on a lathe for years that suddenly have to meet process capability of 1.33 or 1.67 Cpk may require a much narrower bell curve of distribution to stay between the upper and lower support limits. “Flyers” at the fringes of the curve become unacceptable.
How does process capability translate to real world results? The classic Motorola Six Sigma (2.0 Cpk) quality program projected a defect rate of 3.4 parts per million.
High-process capability requires a machining operation that’s easy to “dial in” with precision and is very stable once the process is established. For example, a lathe may get to only a certain value, but if tweaked a little, will jump to a value out of spec and will throw the process off.
A computer-controlled hone can easily get within 10 millionths of a specified size, and with the resolution on the feed systems of today’s machines, the variability is very small. Size control is not the only issue. Honing allows tailoring of the surface finish and then leaves a crosshatch pattern on the bore of the cage.
Alternative processes, such as turning and single-pass honing, cannot produce conventional honing’s characteristic crosshatch pattern on the bore surface. Conventional honing leaves a desirable crosshatch pattern, which can be visualized as two opposing helical patterns that remain on the bore surface.
The crosshatch pattern can be controlled to produce a specific angle and depth, which manufacturers use to control the retention and distribution of lubricating oil films. A crosshatch surface ensures a consistent, full-length flow path for lubrication around the mating parts of the valve.
Conversely, bores finished with single-pass honing, or a single-point tool, will have a faint, single helical pattern on the surface. The resulting “threaded” finish can lead to lubricating films being pushed out of the bore as the oil tends to follow the helix.
In addition to the crosshatch, honing also allows tailoring of the bore’s surface finish to a desired spec. It seems contradictory, but an ultra-smooth surface finish will tend to diminish the lubrication between mating parts, actually increasing frictional resistance. It is common for manufacturers to monitor the surface parameter Ra (average roughness), but parameters such as Rk (core roughness), Rvk (average valley depth) and Rpk (average peak height) can also be monitored—and controlled with honing—to influence the performance of mating parts.
A conventional honing mandrel—which contacts almost the full length of the bore while the part reciprocates—can correct geometric error (straightness, cylindricity) from screw machining or distortion from heat-treating or stress relief. In contrast, a single-pass honing tool is tapered, so only a part of the tool’s length represents the final size. This part of the single-pass honing tool tends to follow an existing path of the bore, so a curved bore will tend to remain unchanged. This is especially true for parts with a length/diameter ratio exceeding 1 to 1.
Precision size and surface finish from honing help eliminate leakage. The process significantly reduces hysteresis and improves the low-voltage reliability of electrically actuated valves, an advantage for units installed on mobile equipment.
What’s on the horizon in honing technology? The latest generation of machines is designed to function as fully automated cells with integrated air-gaging feedback for closed-loop control of the process. It sorts parts by size after processing, and all the parts fall within a size range of 0.000125 inch.
Read Next
Precision Hole Making At High Cpk
Many shops and plants are moving from manual honing machines to CNC honing machines, as well as to robotically automated cells capable of controlling holes size to accuracies of 0.25µm (0.00001 inch). The inherent accuracy and process stability of honing have promoted this changeover because precision parts produced today must meet high Cpk requirements.Honing can produce a specified finish and a desirable crosshatch pattern on the bore surface, which helps retain a lubricating film for sliding components. Makers of outdoor power equipment, motorcycles, ATVs, hydraulics, pneumatics, gears, and valves are some of the users who have "discovered" automated honing in their drive to make parts with tolerances as tight as ±0.0002 inch (±5 µm) at high Cpk levels.
Read MoreA 'HOLE' New Ballgame With Multi-Spindle Honing Systems
Automating the honing process is key to high-volume precision bore production with sub-micron accuracy.
Read MoreWhen You Need Really Accurate Bores
When bore specifications move beyond the capability of more traditional cutting operations, shops look to honing as the next step in the finish and accuracy continuum. Here you'll find a process that, in some applications, produces better results than honing can.
Read More


.png;maxWidth=300;quality=90)


