Precision Inspection System for Electric Vehicle Components
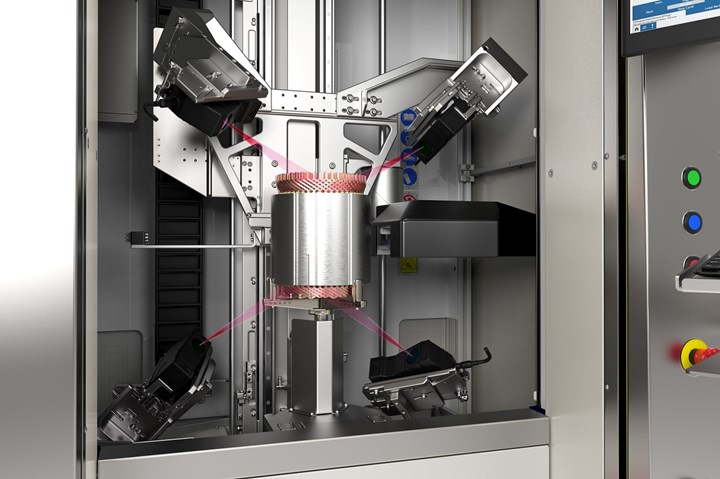
IMTS 2022: Marposs’ OptoCloud EDU uses multiple laser heads in tandem with contact sensors for measurement and vision inspection.
Marposs’ OptoCloud EDU (Electric Drive Unit) is its latest generation of 3D precision inspection solutions designed for the electrical vehicle (EV) industry. Using multiple laser heads in tandem with contact sensors for measurement and vision inspection, OptoCloud EDU is said to reconstruct the 3D model of complex and articulated workpieces in less than a minute to ensure accuracy of the produced component. For example, the company says it can validate 240 electrical contacts of a motor stator in only 30 seconds, which is said to be 100 times faster than a traditional contact system.
The laser heads are integrated over a moving axis designed to position the lasers for the 3D acquisition. To generate a point cloud of the workpiece, the part is rotated 360 degrees, while the different laser heads each acquire spatial data that is then combined into a single 3D reconstruction and graphical representation. The system then executes the requested measurement and vision inspection tasks. Line operators can review images and navigate to the desired level of detail to identify any anomalies.
In addition to quality control capability, Marposs says the multiple laser heads create a point cloud with such a high level of spatial resolution that the details provide a reliable dataset that can also be used for design reviews and final project validation.
It is said part handling is fast and easy with the OptoCloud EDU. Its design features a Z-axis that enables the laser heads to automatically move out of the handling area, leaving a large space for workpiece handling and removing risk of sensor damage due to handling error.
Marposs OptoCloud EDU can handle components up to 300 mm × 300 mm (12" × 12") and weights of 60 kg (132 lbs). The system measures 1200 mm × 1304 mm × 2304 mm (47" wide × 51" deep x 91" tall).
Related Content
-
Addressing Machining’s Necessary Evil
Many view quality control as such, but integrating new measurement technologies and approaches can ultimately minimize QC’s impact on throughput and a company’s bottom line.
-
How Well do You Know Granite Surface Plates?
Here are some tips for choosing, maintaining and customizing a granite solution that will best meet your shop’s particular inspection needs.
-
Zoller Event Shines Lights on Shopfloor Connectivity
The company’s open house event highlighted smart manufacturing solutions from CAM to part.


