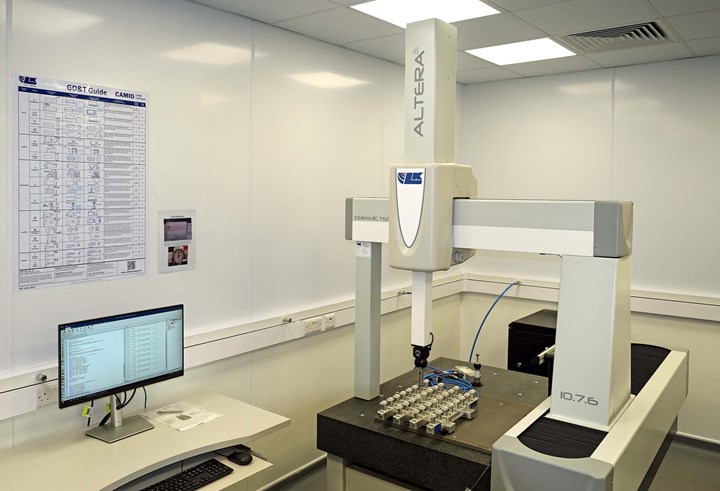
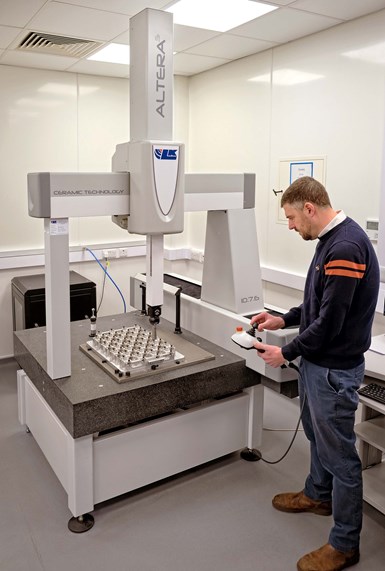
After a bit of setup by Peter Makosa, Alltrista Plastic’s quality manager, automated CMM measurement via touch-trigger and/or scanning can be performed. (Photo credit: LK Metrology)
The two CNC coordinate measuring machines (CMMs) Alltrista Plastics, a Jadex company, had been using 24/7 for more than 10 years at its Christchurch, UK factory had become inefficient. The accuracy and repeatability of touch-trigger probing were becoming compromised due to the age of the machines. The software would sometimes crash, risking a physical collision as well as damage to the probe and perhaps the component being measured.
As the plastic medical parts and assemblies produced had become more complex over time, an angled stylus was often required in an inspection cycle, so an operator had to choose from half a dozen pre-set probe configurations, mount one manually and calibrate it. Additionally, the person would have to sort through different programs on a computer screen to identify and load the correct one.
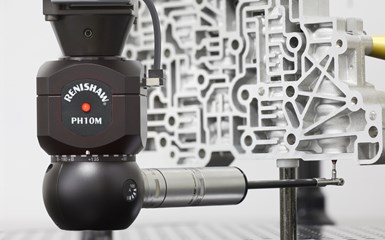
This entire process has since been streamlined and automated with the installation of two new Altera S 10.7.6 CMMs manufactured by LK Metrology. Its Camio three-axis scanning and reporting software was also provided along with a Renishaw SP25M scanning and touch-trigger probe and PH10M motorized indexing head. The SP25M is in effect two sensors in one, enabling continuous path tactile scanning as well as touch-trigger probing of discrete points.
Together with a Renishaw matrix fixturing plate to enable accurate placement of parts for inspection, the setup has resulted in a vast improvement in metrology productivity by facilitating fixturing of samples, speeding measuring cycles and virtually eliminating human intervention and the attendant risk of errors. It would not have been feasible to retrofit scanning capability to the older CMMs, as the cost would have been prohibitive and in any case the machines were becoming obsolete.
“I operated LK CMMs for several years when working for an aerospace manufacturer, which had standardized on their use,” says Peter Makosa, Alltrista’s quality manager. “When Alltrista decided to upgrade its quality room, we approached four potential machine providers including the incumbent supplier. LK’s response was by far the most comprehensive.”
He explains that LK carried out an online demo on one of Alltrista’s parts and another trial during a visit to LK’s headquarters in Castle Donington, UK It also was the only company to initiate a comprehensive on-site survey at Alltrista’s facility to check the feasibility of machine installation.
“On the basis of the measurements taken, bearing in mind that LK machines are taller than our previous CMMs, the manufacturer offered to reduce the height of the Altera S models during their build so they would fit comfortably through our doorways and in our refurbished inspection room,” Makosa says.
The Christchurch site is one of five Alltrista manufacturing locations. The ISO13485-accredited firm specializes in plastic injection molding of devices such as drug delivery systems and packaging such as contact lens blisters for the medical, pharmaceutical and nutraceutical industries.
Medical devices are increasing as a proportion of turnover as well as in variety and production volume, climbing over the past decade from 30 to 50% of throughput and still rising. Another trend is towards ever tighter drawing tolerances on newly designed products and more stringent geometric dimensioning and tolerancing (GD&T) requirements.
A rigorous validation process underpins the manufacture of all products at the Christchurch facility. Typically, at the outset of a new production run, 30 shots containing, say, 15 components each will be run off and checked, with customers requesting a minimum Cpk process capability of 1.33 and often 1.67 or 2 (Six Sigma).
Tolerances are generally fairly open on plastic items, normally in the range 50 to 100 microns, but any inaccuracy of measurement is undesirable as it would consume part of the tolerance band. Even more important for validation is a high level of repeatability.
The use of the scanning probe has resulted in an order of magnitude more information to feed back to the production department for fine-tuning toolmaking and manufacturing.
Alltrista also required more measurement data to better understand certain features on moldings, such as the flatness of sealing faces, freeform profiles and chamfers. The use of the Renishaw SP25M scanning probe has resulted in an order of magnitude more information to feed back to the production department for fine-tuning toolmaking and manufacturing. It also makes for a richer report for customers to understand in more detail the manufacture that is being carried out on their behalf.
Furthermore, the layout of the reports is much better now, as the previous open Excel spreadsheets have been replaced by locked PDFs generated in Camio. They include a color-coded part-to-CAD comparison showing product conformance, with all the accompanying data, Alltrista logo, date and time.
When the CMMs were installed, LK wrote core programs for inspecting components for four major Alltrista customers and also devised a PC screen dashboard so the entire process is menu-driven. The first screen displays an icon for each customer, which when clicked reveals every part that is injection molded for that company. Clicking on the appropriate icon automatically sends the program to the CMM, whereupon the operator keys in their name, whether it is a standard or first article inspection report that is needed and clicks start.

Instead of being mechanically fixtured for inspection, components on this CMM Alltrista are seen here being secured by vacuum. (Photo credit: LK Metrology)
Before the program can be run, however, an array of components has to be placed in a known position on the granite table. To facilitate and speed the procedure, LK supplied a Renishaw matrix fixturing plate with each Altera S 10.7.6.
At no extra cost, anchor bolt holes were drilled into the granite at non-standard centers so the plates could be secured from underneath, avoiding retaining clamps projecting from the table surface. Included on-screen in the dashboard, alongside the relevant inspection program, is a standard operating procedure (SOP) showing the operator the exact location across the numbered grid of holes on the matrix plate that the batch of fixtured samples should occupy.
Nobody will ever say that human error can been removed entirely, but this system in place since March 2022 of positioning components correctly and accurately coupled with LK’s Camio system for program instigation, CNC inspection and automatic reporting comes very close to eliminating all potential errors.
In addition, the Altera S controllers and Camio software were supplied to accept data input from a laser scanning sensor in the future should Alltrista decide that the increasing complexity of its plastic devices requires this further upgrade. For now, though, tactile scanning and touch-trigger probing, including with a multitip stylus to access the underside of components without probe change, provides sufficient capability and capacity.
Related Content
Addressing Machining’s Necessary Evil
Many view quality control as such, but integrating new measurement technologies and approaches can ultimately minimize QC’s impact on throughput and a company’s bottom line.
Read MoreDoes a Scanning Probe Make Sense on a Swiss-Type?
Swiss-types have limited tooling capacity, but there can be advantages to giving up some of that capacity to take advantage of a touch probe — in fact, a scanning probe — to enable in-process part measurements.
Read MoreThe Advantages of Automated Shopfloor Gaging
This “parallel kinematic” gage offers the opportunity to automate and improve machining process control for shops endeavoring to move from sample inspection to 100% inspection.
Read MoreKeeping Watch on Small Parts
From watch parts to exotic medical applications, this shop takes on the world of micromachining.
Read MoreRead Next
5 Aspects of PMTS I Appreciate
The three-day edition of the 2025 Precision Machining Technology Show kicks off at the start of April. I’ll be there, and here are some reasons why.
Read MoreDo You Have Single Points of Failure?
Plans need to be in place before a catastrophic event occurs.
Read MoreA Tooling Workshop Worth a Visit
Marubeni Citizen-Cincom’s tooling and accessory workshop offers a chance to learn more about ancillary devices that can boost machining efficiency and capability.
Read More


.jpg;maxWidth=300;quality=90)


