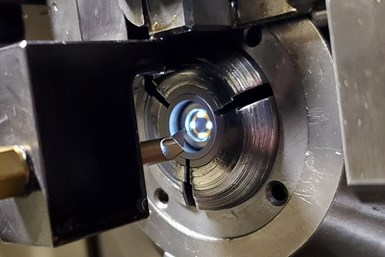
By using the Perfect Zero tool alignment system in a Swiss-type lathe, Ben York says machine shops report an increase in process capability. Photo Credit: Theory 168
What started out as a frustration for one machinist over 30 years ago has led to a solution for a common CNC machine tool problem. Ben York was this machinist decades ago who was determined to decipher why the same part program run on similar machines often produced different-sized part features. Understanding that the core issue was improper tool positioning and not a “ghost” in the machine as he had heard from fellow machinists, York began his experimentation to find a practical way to align tools accurately.
Over the course of his career, he developed the Perfect Zero tool alignment system, which consists of a camera that is placed in a CNC machine tool’s spindle, as well as software to collect the camera’s information as it eyed a tool. The goal of the visual system, which does not require measurement gages, is to help machine shops’ CNC equipment become more repeatable and predictable 24 hours a day, 7 days a week, which equals 168 hours a week — hence, York’s company name, Theory 168.
One machine shop has leveraged this visual tool alignment equipment to improve part size and surface finish consistency as well as increase throughput all while at times tripling tool life on all six of its Swiss-type lathes. Diamond Machining (Amherst Junction, Wisconsin) has also built a strong relationship with York since he first visited the shop to conduct training. In fact, the company now produces some components for the tool alignment system.
It Began With Swiss Integration
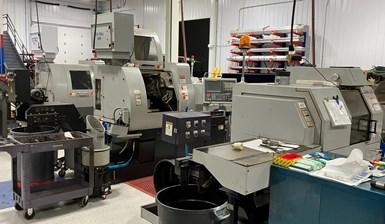
Diamond Machining — the 16-year-old, six-employee shop with a customer base that includes companies in the packaging, heavy equipment, recreational and gun industries — houses five conventional lathes from DN Solutions and four Mori Seiki machining centers in addition to its six Swiss-type lathes from Marubeni Citizen-Cincom, Hanwha and Swistek.
The shop has not always used Swiss-types. However, in 2018, it invested in its first two Swiss-type lathes to complete a job for a recreational customer. Rick Stuczynski, president of Diamond Machining, had requested some training and set up assistance for the new equipment, and York was brought in to do it.
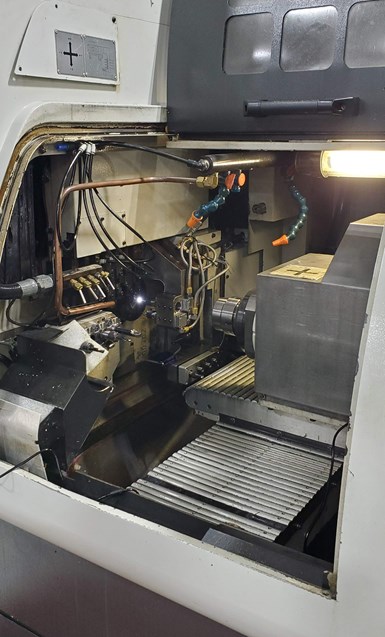
Like Diamond Machining, which aligns 100% of its Swiss-type lathes using the tool alignment system, York says most machine shops do the same once they realize the benefits of doing so. Photo Credit: Diamond Machining
At this initial visit, York taught Stuczynski and his team how to use the Perfect Zero tool alignment system on the Swiss-types in layman’s terms. Stuczynski was immediately impressed with York’s product which he describes as a well-thought-out concept with easy-to-use components and software.
“Ben was intentional about not being overly technical when he designed his software for anyone to use,” Stuczynski says. “And he does a great job of training people to use it.”
Since that day at Diamond Machining when they met, Stuczynski and York have become great friends, which has led to a friendly yet strong business partnership. Because of the trusting relationship they’ve built, the shop now produces camera casings for Theory 168, so both parties are further supporting each other in their businesses.
Easy as 1-2-3
The Perfect Zero system was designed with simplicity in mind for aligning tools on CNC machines and especially CNC Swiss-type lathes. Like all the products developed by Theory 168, York explains that the tool alignment system was created with the goal of scaling the ability to run it for ease of use for all skill levels. He understands that enabling any shop employee to use his equipment is especially critical as the shortage of skilled workers in the industry continues to be an obstacle.
The standard kit in a carrying case includes a half-inch guide bushing camera or a half-inch subspindle camera, some reference targets for calibration, a laptop with the system software installed or the software only (shops may use their own computers), and an adjustable-height computer tray to set up next to the machine being serviced.
Shops perform tool alignment in three steps. First, the user installs the camera in a machine’s collet or a guide bushing by clamping down on the camera, so it becomes one with the main spindle or the subspindle of the machine. Then, the camera plugs into the USB port in the computer.
The three-step process for proper tool alignment makes it easy for anyone to align tools, not only skilled workers. Photo Credit: Diamond Machining
Next, the user calibrates the system using the Perfect Zero software. “In our software, we guide the end user through the calibration. They collect a series of points, which end up identifying the theoretical centerline of the spindle,” York clarifies. “This is a strong way to figure out the most important key component to the machine." He says this process takes less than five minutes.
The third and final step is when the operator calls up the tools in front of the camera. “We manually jog them to a crosshairs that’s on our software screen,” York says. “Then the end user is going to use what we call in the industry a geometry offset page, which tells the machine where the tool is positioned.”
Although York visited Diamond to help the shop set up the alignment equipment, shops can do the setup themselves by viewing Theory 168’s step-by-step YouTube training videos or simply allowing the software to guide them through the steps. According to Stuczynski, a lot of skill is not necessary to set up the equipment, and the entire tool alignment process takes less than an hour to complete.
“You just need to dial your tools in and read your offset once you get it centered in the camera,” he explains. “And, if you're running extremely small-diameter drills, especially when you start getting down to 0.002 inch or less drill diameters, you must be perfectly on center or you will start breaking tools all the time.” He says the smallest drill his company has used on its Swiss-types is about 0.0011 inch, and the machines have not broken a drill since using the tool alignment system.
Microdrills as well as OD tools — including threading tools, turning tools and Y-axis tools — can also be centered with the system.
Applications and Frequency of Use
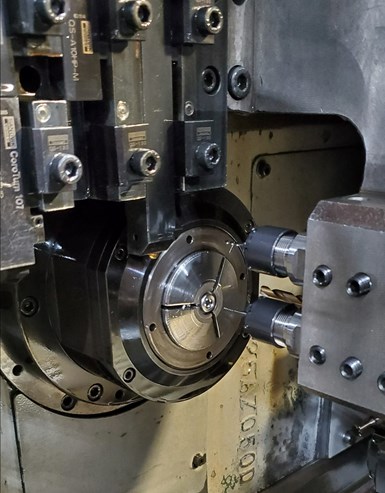
York designed the tool alignment system specifically to align tools on the guide bushing of Swiss-type lathes. The alternative equipment to do this job, which is an indicator, is especially difficult to use in this machining application because the gage can barely fit inside a Swiss machine. And, if it does, it does not generate an accurate measurement, causing errors, according to York. Therefore, with Perfect Zero, York says he developed an error-free system for this application. He explains that it can also be used on any CNC machine, including any lathe, mill, grinder and laser machine.
Some shops use the alignment equipment for troubleshooting, but York recommends using it upon initial machine setup and when setting up a new tool. He also suggests using the alignment system when a job is not running on a machine as well as for maintenance once every four weeks. “Specifically on a Swiss-type, put a camera in the machine and check both ends of the gang slide for a position to make sure it hasn’t moved since the last use,” York explains.
The fact that the tool alignment system is designed as a noncontact device eliminates the possibility of the equipment chipping the tool and causing the need for replacement.
When using the system for maintenance, he recommends using the software, which saves all positional measurement history, to check the current tool positioning to identify what has changed. Asking questions like “is the machine drifting” and “is there a range that it is moving around in” will help get to the root cause of the problem.
York says the software is also useful for reviewing past setup times. If these setups take longer than predicted, most likely there are positional problems.
Diamond Machining uses the alignment system for almost every setup, especially if it is more complex or a higher production run. Stuczynski explains that the only time they would not use the system is if they are running jobs using the same tool or roughly the same tool as the prior job on that machine. Therefore, between its six Swiss-types, the shop is doing a couple setups a week using the tool alignment system.
Tool Life Is Everything
Improvements in tool life and surface finish are the biggest benefits Diamond Machining is enjoying since applying the tool alignment system. According to Stuczynski, his Swiss-type tool life has doubled and, in some cases, tripled. “We’ve run a fair amount of repeat work here,” he says. “And we know what our tool life used to be, and then we used the tool alignment system, even on a turning insert. When you get that dialed right in, it drastically improves tool life.”
Diamond Machining has experienced many benefits to using the tool alignment system regularly. The biggest one is tool life savings and the advantages that accompany that, according to Rick Stuczynski.
Photo Credit: Diamond Machining
Saving money and time and increasing throughput by not changing out broken or worn tools as often as he could be is only one benefit of employing this system. He adds that it also has enabled the shop to hold tight tolerances on those Swiss-type machines that have been tool aligned. For example, certain tools on the Swiss-types can produce a 32 Ra surface finish on parts. This eliminates a secondary process. “It often takes another operation, sometimes grinding, to get such surface finishes,” Stuczynski says. “So, we are able to eliminate a grind step or a hone just because we can hold that tolerance on the machine.”
The fact that the tool alignment system is designed as a noncontact device eliminates the possibility of the equipment chipping the tool and causing the need for replacement.
Also, York says his system produces an extremely accurate positional alignment reading. However, when tooling is added to the tool block, tool sleeve, collet and cutting tool, a stack up of error occurs, he explains.
“The error stack up we are seeing on a sleeve inside of a Swiss is 0.001 to 0.005 of an inch,” York says. “This is based on how the set screws are tightened and that cannot be changed very easily. The tool alignment system looks directly at the tool and can align it to the spindle with a position error of 0.0004 of an inch or better. Leaving the sleeve in the machine and not realigning again is best.”
Simply because a machine might be aligned does not necessarily mean that the tool tip is positionally aligned with the center of the spindle, York adds. He says the ratio of error to tool diameter should be considered. “If we’re dealing with a 0.010-inch diameter drill and it’s off by 0.001 inch, that’s 10% of the tool diameter,” York says. “That’s definitely not going to work.”
Theory 168 | theory168.com
Diamond Machining | diamond-machining.com
Related Content
Pursuit of Parts Collector Spearheads New Enterprise
While searching for a small parts accumulator for Swiss-type lathes, this machine shop CEO not only found what he was looking for but also discovered how to become a distributor for the unique product.
Read MoreSoftware Controls Chip Breaking in Thread Turning Operations
This cutting tool manufacturer has developed a software module for chip control of thread turning operations in virtually any CNC lathe, even for older machines, using specific tooling and software.
Read MoreMoldmaker Finds Value in Swiss-Type Machining
This multifaceted manufacturer has added CNC sliding-headstock turning technology to complement its established mold tooling production and new injection molding capabilities as it continues to pursue complex medical work along a vertically integrated path.
Read MoreVideo Tech Brief: “Doubling Down” on B-Axis Capability in a Swiss-Type
This Swiss-type lathe has two programmable B-axis units and the capacity for two individual thread whirling units.
Read MoreRead Next
Targeting Spindle Alignment for High Machining Accuracy
This 5-axis laser target for spindle and axis alignment offers a fast and highly accurate way to measure spindle alignment, axis straightness and squareness on lathes, multitasking machines, machining centers and ID/OD grinding machines.
Read MoreA Tooling Workshop Worth a Visit
Marubeni Citizen-Cincom’s tooling and accessory workshop offers a chance to learn more about ancillary devices that can boost machining efficiency and capability.
Read MoreDo You Have Single Points of Failure?
Plans need to be in place before a catastrophic event occurs.
Read More.png;maxWidth=970;quality=90)




.png;maxWidth=300;quality=90)


