Fast Fixturing for Inspection and Laser Marking
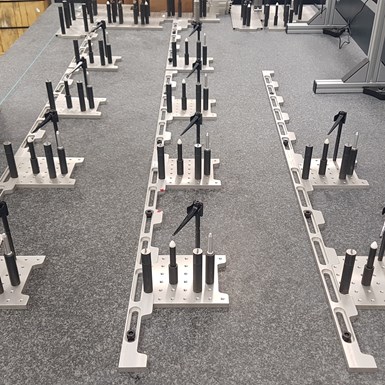
The versatility of the Inspection Arsenal and Laser Arsenal modular fixture plate systems enables fixturing to be built on the individual grid plates. The plates can be easily removed from the magnetic docking rail when not needed.

This versatile fixture plate system, now called Inspection Arsenal, allows easy customization and modification, while providing an alternative to traditional methods for holding parts during CMM inspection. (All photos courtesy of Phillips Precision Inc.)
Not all shops can boast that they have developed several products to sell for one industry that have stemmed from each other, helping their own production problem-solving, while also helping their colleagues become more efficient along the way. But Phillips Precision Inc. (Boylston, Massachusetts) can.
This company is more than a machine shop housing CNC vertical and horizontal mills and lathes to manufacture parts. Phillips Precision got its start nearly 25 years ago machining complex prototypes and has since shifted to light to mid-range production for many industries. Recalling its roots, Phillips refers to itself as a “manufacturing laboratory” that offers its own product lines, which its owners have developed in-house. Two of these products are modular, interlocking workholding fixture plate systems known as the Inspection Arsenal and Laser Arsenal Loc-N-Load quick-swap fixture system.
The Inspection Arsenal was devised from the company co-owner’s first invention, the Pitbull Clamp, now owned and distributed by Mitee-Bite Products LLC.
The Pitbull Clamp is a rocking lever clamp that uses both horizontal and vertical clamping forces to secure workpieces for machining. It is available in different sizes and styles.
“Prior to Pitbull Clamp, we kept having to slow our feeds and speeds,” explains Allan DeLisle, technical sales coordinator at Phillips Precision. “For parts fixtured with Pitbull, we were able to considerably increase feeds and speeds, take deeper, faster cuts without losing parts and breaking tools, thereby increasing production and profits on our jobs.”
The sudden production increase caused part inspection to become a bottleneck. Coordinate measuring machine (CMM) operators in the shop’s quality assurance (QA) department were building part-specific fixtures as fast as possible, but would have to tear them down to create new fixtures for other parts. Because of this time-consuming process, there was no way for QA to keep up with higher production volumes.
Phillips Precision co-owner, Steve Phillips, figured out a way to build and keep CMM fixtures for a specific part on a grid plate and store the plate with fixtures on a shelf when they are not in use.
Phillips Precision co-owner, Steve Phillips, invented a way to build and keep CMM fixtures for a specific part on a grid plate and store the plate with fixtures on a shelf when they are not in use. When it came time to measure that part again, the CMM operator could simply pull the proper plate from the shelf and use. The system works well for small job shops that need to inspect multiple short-run jobs throughout the day and for large manufacturers with high-volume, multipart families requiring unattended or lights-out inspection.
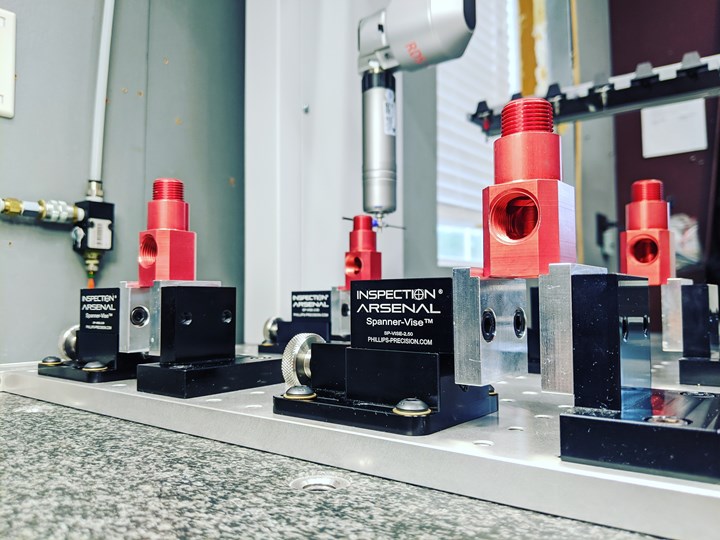
This versatile fixture plate system, now called Inspection Arsenal, allows easy customization and modification, while providing an alternative to 1-piece grid plates, double-sided tape, modeling clay and other traditional methods for holding parts during CMM inspection. It includes a docking rail that is bolted down one side of a CMM’s bed into which individual grid plates install like puzzle pieces and magnetically attach. Fixturing is built on the individual grid plates and plates can be easily removed from the magnetic docking rail when not needed, providing easy access to the granite surface of the inspection equipment.
Docking rails are available in 12-, 18-, and 30-inch lengths and are designed with counterbore slots enabling them to bolt to work on any inspection equipment. To customize Inspection Arsenal, many vises, clamps and chucks are available from the company, including customized fixture designs.
DeLisle says Phillips Precision has even laser marked bar codes and part numbers on their plates and accessories for customers so the operator can simply scan the bar code to be sure the correct fixture is being used for a part. Because all of Phillips’ products are laser marked and branded with logos and part numbers, they quickly realized that the system is also perfect for laser marking. Hence, the Laser Arsenal was invented.
Fixturing Facilitates Unattended Laser Marking

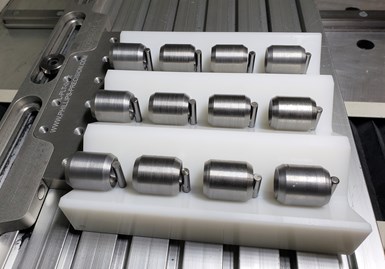
The Laser Arsenal is designed to fit all laser marking systems, and several plates and clamps can be purchased as accessories to the system for customization.
Loc-N-Load quick-swap plates are sold into this market under the brand Laser Arsenal. Like the Inspection Arsenal, Laser Arsenal uses the same magnetic, interlocking, quick-swap fixturing method. It is designed to fit all laser marking systems, and several plates and clamps can be purchased as accessories to the system for fixturing that speeds the task of laser marking. Preconfigured bundled systems include 52 pieces, which include a docking rail of the customer’s choice and a variety of fixture plates and workholding components. Bundled system rail options are the same as Inspection Arsenal (12-, 18- or 30-inch).
The Laser Arsenal fixture system has been beneficial to Armstrong International (Three Rivers, Michigan). Zac Findlay, its senior manufacturing engineer, says, “The fixturing allows us the flexibility to run any number of unique parts per hour without lengthy setup and changeover time. It takes about one minute to change all five plates out to run a different part. With two operators and the volume of parts marked, the system will pay for itself very quickly.”
Slight Differences
Although the Inspection Arsenal and Laser Arsenal product is the same, the differentiator between the two brands is only in the manufacturing process. When designing fixturing for a laser marking machine, not as much clamping force is necessary as it is for a CMM. Laser marking setups only require that the part be fixtured for parts not to move – a repeatable stable setup.

For a CMM, the measurement probe descends and touches the part, so it is critical that the fixture is not holding the part too tightly, but also not too loose. To alleviate these problems, the clamps on the Inspection Arsenal hold parts in place at their most natural state.
DeLisle says, for a CMM, the measurement probe descends and touches the part, so it is critical that the fixture is not holding the part too tightly, but also not too loose. If the part is held in place too tightly, too much pressure can be unintentionally put on it, causing distortion and a bad measurement. However, if the part is not held tightly enough, the part might move while the probe touches it, which is also undesirable.
To alleviate these problems, the clamps on the Inspection Arsenal hold parts in place at their most natural state. According to DeLisle, clamps are only needed for the Laser Arsenal if a part must be held in a certain position during laser marking.
Lights-Out Inspection and Marking?
Systems such as Inspection Arsenal and Laser Arsenal save time for operators by eliminating the need for designing and building their own fixtures in-house and rebuilding fixturing for every new part. The systems also save shops money because operators can tear down a fixture that is no longer needed and use those pieces for the next fixture. “It is a way to build a dedicated fixture out of a standard product,” DeLisle says.
These dedicated fixtures can help the industry move forward by eliminating the need for highly qualified programmers and staff, according to DeLisle. He explains that with the skills shortage so many machine shops are facing, offering products that eliminate the dependence on tribal knowledge is helping the industry move forward.
“People can come off the shop floor and inspect their own parts,” he says, regarding using the Inspection Arsenal.
The Inspection Arsenal’s modular concept also enables moving fixtures easily from one machine to another with virtually no downtime, making the systems even more versatile.
In fact, as Phillips Precision continues to move forward with more efficient precision machining processes by developing the Inspection and Laser Arsenals, the company is advancing in automation for these products as well. It is working with a robotics integrator that supplies collaborative robots (cobots). The company has also developed a set of grippers and handles to attach to its fixture plates, which would enable the customer to simply stage parts and then use them for lights-out machining. The robotic arm would load and unload fixture plates on and off the CMM overnight or without a machine operator present.
Phillips Precision Inc. | 508-869-0373 | phillips-precision.com
Related Content
Streamlining Part Measurement, Data Collection Processes
When collecting measurement data automatically with a wireless data collection system, manual errors can be eliminated ensuring data accuracy and traceability.
Read MoreZoller Event Shines Lights on Shopfloor Connectivity
The company’s open house event highlighted smart manufacturing solutions from CAM to part.
Read MoreDoes a Scanning Probe Make Sense on a Swiss-Type?
Swiss-types have limited tooling capacity, but there can be advantages to giving up some of that capacity to take advantage of a touch probe — in fact, a scanning probe — to enable in-process part measurements.
Read MoreVideo Tech Brief: Quality Control is Using the Right Software
This machine shop’s mapping software program runs on its gaging system to increase the accuracy of the probe’s tolerance measurement on the thin-walled aluminum tube machined by the shop.
Read MoreRead Next
Inspection System Helps Company Meet Short Lead Times
A digital video inspection system from Starrett is increasing this company’s inspection throughput and helping it get parts to its customer on time.
Read MoreAutomated Inspection on the Shop Floor
Most machine shops understand the value of automation when it is applied to such operations as turning, milling and grinding.
Read More5 Aspects of PMTS I Appreciate
The three-day edition of the 2025 Precision Machining Technology Show kicks off at the start of April. I’ll be there, and here are some reasons why.
Read More


.jpg;maxWidth=300;quality=90)


