AIMS Metrology Partners With OGP to Advance Measurement Solutions
The affiliation with OGP will enable AIMS to provide multisensor measurement with its optical gaging products.
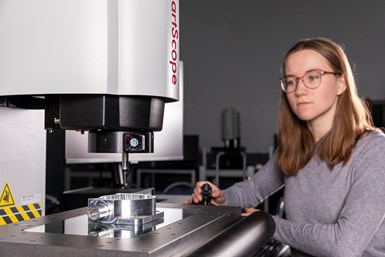
AIMS Metrology (Advanced Industrial Measurement Systems) announced it has partnered with Optical Gaging Products (OGP). The affiliation with OGP will enable AIMS to provide multisensor measurement with optical gaging products including Smartscope E-Series.
In addition to its Revolution Series Summit 10.10.10, LM and HB five-axis CMMS, AIMS now adds OGP products that include its patented C Vision. The video contour projectors combine video’s speed and accuracy with the capacity of an optical comparator for 2D measurement.
OGP’s TurnCheck systems measure shafts and other cylindrical parts with precision optical instruments. The optical gauging product line also provides high-speed 3D inspection systems that integrate a combination of sensors into one measurement platform. The line can measure and inspect smaller parts with high precision features as well as bigger components with a large platform multisensor system.
Tim Fantauzzo, vice-president of OGP North American sales, says, “There are many similarities between OGP and AIMS. We both strive to build and provide the most innovative measurement solutions to our customers. All of us at OGP are extremely excited to form a true partnership with such a like-minded organization. The result will be a full and complete portfolio of advanced measurement solutions for customers in North America.”
“OGP has more than 75 years of technical innovation behind its non-contact and multisensor dimensional metrology technology. The company also manufacturers its products in the U.S. Partnering with OGP was a good fit for us,” says Mark Gearding, vice president and co-owner of AIMS Metrology. “Whether it’s a five-axis CMM or optical gauging product, our goal is to provide a turnkey package with the service and support that customers need.”
Related Content
-
The Value of CMM Controller Retrofits
In this case, new controllers for two coordinate measuring machines — one 26 years old — with new programming software offers the possibility to enable multisensor inspection of critical, turned aerospace components.
-
Shop Finds Value in Simple CMM Programming
Icon-driven programming enables all shopfloor personnel to perform CMM inspection, not just those in the quality department.
-
Replace Repetitive Measurement With DIY Robotic Automation
After minimal training, a shop can learn how to use this robotic inspection system configured for a shopfloor application to supersede repetitive, time-consuming, high-mix gaging processes. It can then be redeployed for another application somewhere else in the facility.


.jpg;maxWidth=300;quality=90)


