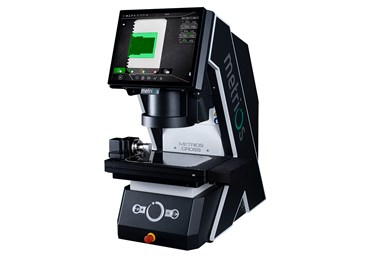
Optical Measurement for Flat and Cylindrical Parts
The machine’s automatic rotation function works to ensure accurate static and dynamic measurements using a single instrument, giving users repeatable, short cycle times.
Metrios’ Re-Light optical measuring machine is said to provide users with a single device for components of all shapes, including flat and cylindrical. Due to the machine’s automatic rotation, the machine can measure every side of a part in one complete cycle, the company says.
The machine features a wide working field, fast measuring speeds and an industrial 17-inch multi-touchscreen for clear visibility and simple operation. The machine is said to check components in cost-effective, short cycle times with precision and reliability.
Central to the machine’s capabilities is its automatic rotation function to obtain both static and dynamic measurements using a single instrument, giving users repeatable short cycle times. It is said customers can obtain all of the results in a single Metrios report which is said to simplify the entire quality control process.
Another feature is the guided-part orientation for correct first-time positioning which can help eliminate operator error and avoid unnecessary delays when there is a need for corrective action.
With traditional optical measuring machines, there may be some concern about whether awkwardly shaped components will sit level on the glass surface. When using the Re-Light, users can simply deploy the ‘Re-Light’ function to position any parts that do not sit comfortably on the measuring surface.
The machine can also measure any type of cylindrical part/feature. Whether the component has undercuts, keyways or any other complex features, the machine automatically finds the reference point to orientate the measurement. As a result, users benefit from adopting a standard process that measures all parts the same way, the company says.
The machine uses a high-resolution camera and three different lighting systems to ensure accuracy. Through a motorized ring light, the Re-Light can change the angle of lighting incidence on the part and provide different angles of light source within the same measurement cycle.
The system also offers the basic advantages of a noncontact measuring system, such as highly accurate dimensional measurement in seconds and suitability for parts that would be too sensitive for measurement using a tactile probe.
Related Content
-
Video Tech Brief: Quality Control is Using the Right Software
This machine shop’s mapping software program runs on its gaging system to increase the accuracy of the probe’s tolerance measurement on the thin-walled aluminum tube machined by the shop.
-
In-Machine Probing Possibilities for VTLs
A manufacturer of vertical turning centers uses a “push/pull” optoelectronic probe with custom bracket to enable its machines to perform effective, in-process measurement of shafts and related automotive components.
-
Addressing Machining’s Necessary Evil
Many view quality control as such, but integrating new measurement technologies and approaches can ultimately minimize QC’s impact on throughput and a company’s bottom line.


