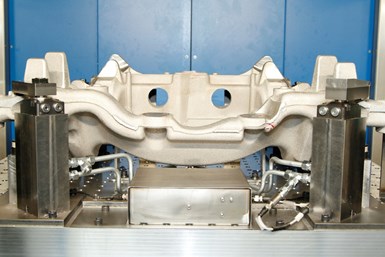
Sensory Clamping Devices Identify Defects Prior to Machining
IMTS22: Roemheld North America’s sensory clamping devices enable operators to reject a faulty cast aluminum blank before any machining begins.
Roemheld North America’s sensory clamping devices developed by Roemheld GmbH in partnership with August Wenzler Maschinenbau. Sensor clamping technology detects defective blanks and monitors production.
Roemheld developed a digital clamping technology that combines electromechanical design with sensor-equipped hydraulic clamping devices. It is said to enable clamping devices to identify casting defects and contour fluctuations in the raw part. This enables the operator to reject a faulty cast aluminum blank before any machining begins. Information is also provided on whether the workpiece has been inserted correctly, whether the clamping position and clamping pressure are correct, and whether the required clamping and support forces are being achieved.
Features and benefits of sensory clamping device include equipped swing clamps with sensors to detect the condition of structural blanks made of cast aluminum. Additionally, it features continuous monitoring of machining from loading and unloading, and it detects insertion errors and continuously provides information about the clamping position and clamping force on the component during machining.
Related Content
-
The Advantages of Automated Shopfloor Gaging
This “parallel kinematic” gage offers the opportunity to automate and improve machining process control for shops endeavoring to move from sample inspection to 100% inspection.
-
Addressing Machining’s Necessary Evil
Many view quality control as such, but integrating new measurement technologies and approaches can ultimately minimize QC’s impact on throughput and a company’s bottom line.
-
How Well do You Know Granite Surface Plates?
Here are some tips for choosing, maintaining and customizing a granite solution that will best meet your shop’s particular inspection needs.


.jpg;maxWidth=300;quality=90)


.jpg;maxWidth=300;quality=90)


