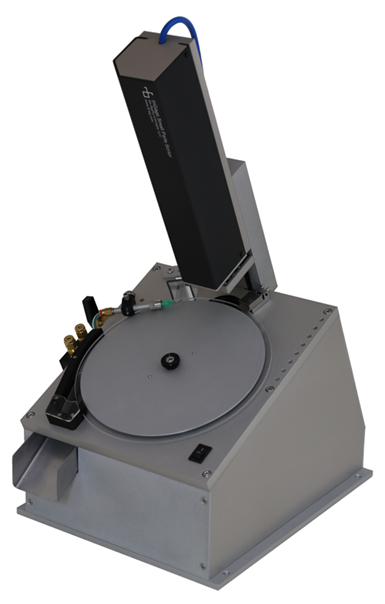
Six Sigma's Orion Mini Sorts Small Parts with Tracking Software
Parts continue to travel around the platen after inspection until they arrive at an air blow-off.

Six Sigma Concepts’ Orion Mini is a high throughput sorter specialized for small parts. It transports parts for sorting on a tilted rotating glass platen with a metal shoulder. Long pin-like parts lie sidewise on the platen while flatter washer-like parts lie with their flat side on the platen. This enables backlit optical inspection of overall lengths for longer parts and internal through features, such as inner diameters, for flat parts. The machine can measure sidewise lying parts up to 0.500” long and 0.125” wide and flat-lying parts with outer diameters up to 0.200”.
A small field-of-view telecentric imager acts like a magnifier, increasing image resolution and measurement accuracy. The system can measure part features to an accuracy within 0.00005”. Image acquisition and analysis takes less than 100 milliseconds, allowing the system to inspect 10 parts, although part size and feed can often limit the sorting rate. The Orion Mini’s continuous inspection enables the platen to rotate at a constant speed, simplifying part feeding requirements, Six Sigma says.
Parts continue to travel around the platen after inspection until they arrive at an air blow-off. Parts that pass lying flat are blown down a chute, while parts that fail continue around until gravity drops them down a separate chute. Both part counts and measurements can be tracked and recorded. Sorter parameters including blow-off timings and platen speed can be edited by the end-user to be optimized for different part sizes.
The Orion Mini uses Ingage inspection and sorting software, which contains tools for feature extraction and measurements such as lengths, radii, angles and threads. It also features a part tracking tool and a part senor tool. These tools adjust the measurements to changes in part position and trigger part inspection. All tools and settings can be saved and recalled. Complete software is included and communication with statistical process control is available.
Related Content
-
In-Machine Probing Possibilities for VTLs
A manufacturer of vertical turning centers uses a “push/pull” optoelectronic probe with custom bracket to enable its machines to perform effective, in-process measurement of shafts and related automotive components.
-
Automated Inspection Transforms Medical Manufacturer’s Quality Control
Manual steps for part inspection have been eliminated with a new CMM process using more advanced software and strategies such as using a combined scanning/touch-trigger probe.
-
Video Tech Brief: Quality Control is Using the Right Software
This machine shop’s mapping software program runs on its gaging system to increase the accuracy of the probe’s tolerance measurement on the thin-walled aluminum tube machined by the shop.


.jpg;maxWidth=300;quality=90)


