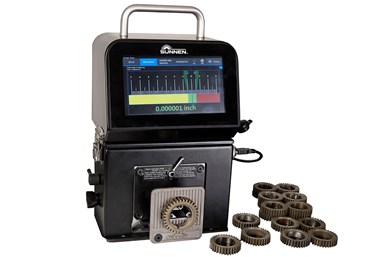
Sunnen Electronic Bore Gage for Fast, Easy Monitoring
The PGE-6000 electronic bore gage is well suited for quick, simple, economical process control in almost any manufacturing environment.
Sunnen’s PGE-6000 electronic bore gage is said to enable precise control of final bore size and quality of purchased or semifinished parts, with an instant digital or numerical readout for 100% inspection. The electronically amplified comparative bore gage is well suited for quick, simple, economical process control in almost any manufacturing environment, said to combine lab-precise accuracy with a robust design built for everyday shop use.
According to the company, an easy-to-follow setup menu handles all pertinent information required for fast, easy part inspection. An onboard computer can store serialized part measurement data for use in statistical process control (SPC) analysis. Data is downloaded directly into a PC via a cable or USB drive, which also is used for software updates.
A viable alternative to air gaging in many instances, the PGE-6000 gages are said to provide reliable, flexible ID gaging on the manufacturing floor with no need for probes or master rings. A single gage can measure a wide range of part sizes, offering greater versatility at a lower cost than a comparable air gaging system. The standard unit handles bore diameters from 0.370 to 1.50″ (9.40 to 38.10 mm) utilizing adjustable gaging fingers on both sides of the gage.
Installing the optional gage finger extensions increases the bore diameter range to 1.50 to 3.00″ (38.10 to 76.20 mm) to accommodate even larger parts. It is said the upper control/display unit is easily rotated to utilize either side of the mechanical measuring system.
A large 7″ diagonal (178 mm) color touchscreen, with easy-to-use setup and measurement displays, enables operators to tailor the gage to the application. Compact and easily portable, the gage can be mounted right at a machining station or in a QC or lab setting. The optional PG-400 or PG-500 adjustable setting fixtures simplify setup, while eliminating the need and expense for plug gages, jo blocks, master rings or micrometers.
Related Content
-
PMTS 2023 Product Preview: Measurement
Learn about some of the latest measurement solutions that will be on display at PMTS 2023.
-
Precision Machining Technology Review: November 2024
Production Machining’s November 2024 technology showcase includes some of the latest technology from Vericut, Hurco, the L.S. Starrett Co., LNS North America, Fryer Machine Systems and MachineMetrics.
-
The Value of CMM Controller Retrofits
In this case, new controllers for two coordinate measuring machines — one 26 years old — with new programming software offers the possibility to enable multisensor inspection of critical, turned aerospace components.


.jpg;maxWidth=300;quality=90)


