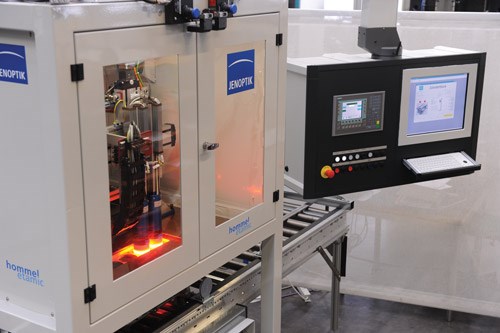
Automated Bore Finish Inspection
Inspection of bores for engine blocks, transmission cases, connecting rods, steering gear cases, and cylinder liners, while necessary to ensure quality surface finishes for effective performance, has historically required an operator to evaluate the finish.
Inspection of bores for engine blocks, transmission cases, connecting rods, steering gear cases, and cylinder liners, while necessary to ensure quality surface finishes for effective performance, has historically required an operator to evaluate the finish. But Hommel-Etamic (Rochester Hills, Mich.), which is a division of German manufacturer Jenoptik, now offers a method for automating this process that eliminates manual inspection and provides objective, consistently reliable results more quickly than a manual process. Complex and precise classifications of the surface defects are performed simultaneously, resulting in a defined level of quality without unnecessary discharge of components as “not OK” when they are actually within the specification limits.
Designed for continuous flow lines of a single component, this automatic system can be calibrated to virtually any desired level of tolerance. If a section of a bore is known to have potential for a flaw, the sensor can be optimized to take a closer look at that area, saving cycle time.
The IPS-100 internal test sensor is inserted into the bore to seamlessly scan the inner surface. No rotational movement is required, so only a brief image exposure time (5-7 seconds) is required per bore. A 360-degree circular optical system is advanced into the bore and generates an image of the bore’s inside surface. Circumferential lines in the bore are represented as rings in the image. The image is continuously scanned by a high-resolution CMOS (complementary metal oxide semiconductor) imager. Simultaneous forward advancing of the inspection sensor and circular scanning allows for the generation of an undistorted image of the bore’s inner surface.
The system can handle any bore depth with diameters from 75 to 110 mm. The scanning technology is scalable and can be applied in applications as low as 5 mm in diameter. In hydraulic applications, it can evaluate cross holes within the ID and scan for burrs or other programmed defects in the bore surface.
The high, single-pass scanning rate allows the IPS-100 to be advanced rapidly, which promotes short inspection cycle times. Fully automated testing of the surface of all cylinder bores in a crank case can be tested on the line with a cycle time of 35 to 60 seconds.
Increasingly, automotive builders are applying plasma coating technology in engine blocks and other wear surfaces in lieu of liners. Some use a spiral pattern in the bore to aid in adhesion of the plasma alloy. In some cases, minor defects are acceptable and can be programmed to be overlooked by the scanner.
The system recognizes all surface defects such as blowholes, scratches, porosity and furrows. It can test honed and rough-honed surfaces along with any others that occur during the production process. High-contrast, high-resolution images are generated so that the system software automatically evaluates for defects. It then provides immediate reports to production management, not only about product quality, but also manufacturing process capability.
Related Content
-
Zoller Event Shines Lights on Shopfloor Connectivity
The company’s open house event highlighted smart manufacturing solutions from CAM to part.
-
Replace Repetitive Measurement With DIY Robotic Automation
After minimal training, a shop can learn how to use this robotic inspection system configured for a shopfloor application to supersede repetitive, time-consuming, high-mix gaging processes. It can then be redeployed for another application somewhere else in the facility.
-
Shop Finds Value in Simple CMM Programming
Icon-driven programming enables all shopfloor personnel to perform CMM inspection, not just those in the quality department.


