Dimensional Inspection in the Digital Age
Advanced digital technology has had a significant role in helping shops keep pace with ever increasing customer demands for quality.
Today’s machine tool technology allows very high precision parts to be machined consistently and economically with high process stability. Advanced machine tool design and direct CAD-to-machine tool interfaces have reduced many uncertainties that were previously managed by frequent inspection and process adjustment. Likewise, measurement tools have evolved to keep pace with the workflow demands of advanced machining operations. Digital technology has enabled a host of innovations that make today’s measuring tools fast, accurate and convenient to use on the shop floor.
The Benchmark
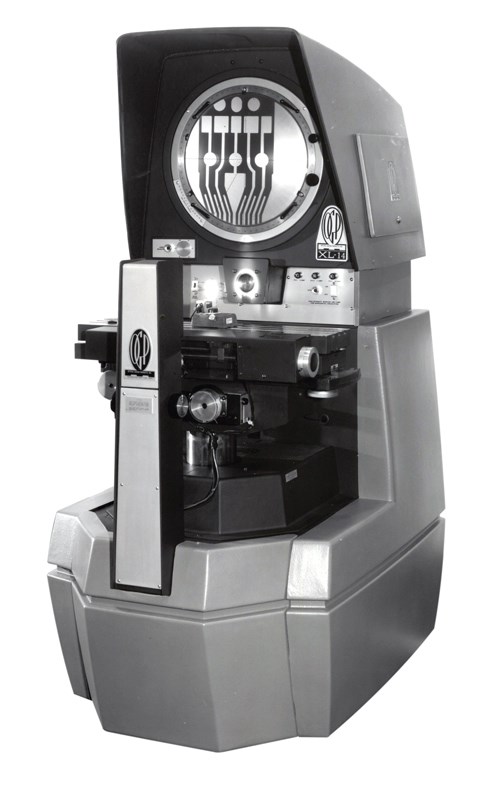
Optical comparators are the tried-and-true benchmark for shopfloor measurement. Comparators are hard to beat for economy and ease of use, but are limited in their capability and speed. Customized chart gages and simple DRO controllers make basic comparators too specialized and too slow to keep pace with high volume shop production. However, recent advancements in digital technology have made a dramatic impact on the productivity of these familiar, shop-friendly tools.
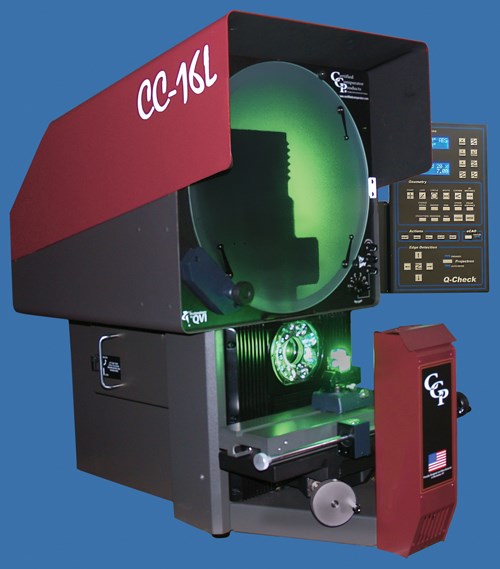
While today’s optical comparators look much the same on the outside as their counterparts from yesteryear, they are radically different on the inside. Today’s comparators use only high intensity LED light sources. This lighting provides the brightness needed to measure at higher magnifications, which in turn makes for more accurate measurements. LED sources also reduce the uncertainty of automatic edge detectors. The light sources are so stable that edge repeatability as good as 2 microns is routinely possible, compared with 4 to 5 microns with conventional filament or vapor light sources.
LED light sources eliminate much of the periodic maintenance needed for a comparator. Their heat load is easily dissipated using passive heat-sinks, eliminating the need for cooling fans, which add vibration and can blow dirty shop air into the comparator optics. They also have a virtually unlimited lifetime, eliminating replacement costs and hazardous disposal issues.
LEDs also allow more versatile designs in the light sources. They can be arranged in unique configurations and each LED in an array can be controlled on an individual basis. This modular nature allows design of highly efficient oblique surface lighting, where the direction, angle and intensity of the light can be controlled to highlight part features at an angle with respect to the part’s surface. Well designed oblique lighting makes it possible to see and measure small chamfers, beveled edges and other angled features that would not focus sharply with only square-on surface light.
CAD Driven Comparators
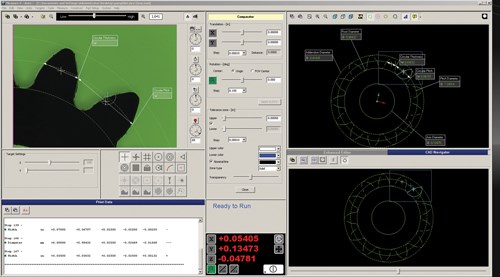
Digital technology has also enabled another game changer for optical comparators—the digital chart gage. A high resolution digital projection system inside the comparator projects a CAD drawing with tolerance bands onto the comparator screen. The part image can be easily compared with the CAD drawing, just as one would do with a traditional overlay chart. The eCAD system from Certified Comparator Products, for example, automatically scales a part’s CAD drawing to the comparator screen based on the magnification lens being used. Color-coded tolerance bands make it easy to judge if a part is in tolerance. When the comparator stages are moved, the coupled CAD image and tolerance zones move with the image automatically. This capability is important because it allows larger parts to be conveniently inspected on a smaller screen at higher magnification, assuring better accuracy.
Direct CAD projection is a vital time-saver in a high-mix environment, enabling new digital chart gages to be produced instantly. Unlike Mylar or glass charts, digital charts don’t need to be stored, handled, cleaned or re-calibrated. Best of all, the digital chart gage is re-scaled automatically when a different magnification lens is selected. Imagine being able to zoom from 10× to 50× for a closer look and have the chart gage automatically resize in an instant.
Using a part’s CAD file as the basis of the inspection process can be taken one step further with automation software that builds an automatic measuring routine directly from the CAD file. The eChek software, which operates motorized comparators made by Quality Vision International, allows a measurement sequence to be created simply by clicking on features of the CAD model. Feature details are automatically extracted from the CAD file. eChek provides complete feature measurement and construction capabilities including GD&T. This capability transforms a simple comparator into a sophisticated 2D coordinate measuring machine, while eliminating the tedious task of “programming” the measurement routine.
Digital Cameras Add Productivity
Digital camera technology has also helped to modernize optical comparators. The ability to take a digital snapshot or video of the screen image at any point in the inspection is invaluable for documenting defects or for creating detailed work instructions for part inspections.
Digital cameras can play an even more important role when used to make measurements. The fundamental comparator technique is to mark the position of the stage when a part’s edge crosses the centerline of the comparator screen. For decades, automatic edge detectors synchronized with the stage position readout have automated this process, eliminating the operator’s judgment from the measurement uncertainty. In the 1980s, early solid state video cameras began to be integrated into comparator optics to image a portion of the comparator field of view and make automatic edge measurements. Optical Gaging Products introduced its VidiProbe camera and 2D measuring software in 1982.
Fast forward to today, and Vidiprobe is reborn using the latest in digital video technology. Integrating a high megapixel digital camera into the comparator optics enables the comparator to measure entire features in one snapshot, rather than measuring individual points with each stage movement. Digital zoom and image pan enable the user to easily zoom in for a closer look at the image instantly, without changing the comparator lens. The speed and precision afforded by an integrated video camera adds yet another level of capability to the familiar optical comparator.
The New Comparators
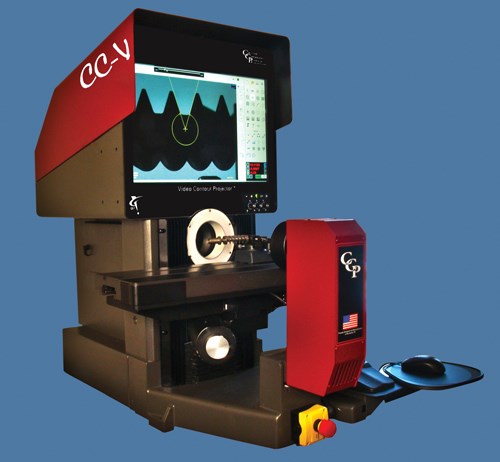
Another new wrinkle in shop-friendly inspection and measurement is Certified Comparator Products’ Video Contour Projector. This hybrid system combines the external arrangement of a horizontal contour projector with the large field of view/long depth of focus optics of a digital measuring system. Much like a conventional optical comparator, the Video Contour Projector forms a precisely magnified image of the part being inspected, but instead of projecting the image on an analog screen, the image is presented to a high resolution metrology camera, which digitizes the image and presents it on a touch-screen display. The vital technology in these systems is the telecentric optical assembly, which forms an accurate image of parts up to 6 inches thick, eliminating the need to focus each edge precisely for measurement.
The ability to digitally pan and zoom the image, and the availability of sophisticated measuring tools such as QVI’s FeatureFinder, give these systems the flexibility to be used as walk-up inspection stations, as comparators with electronic overlay charts, or as fully automatic 2D measuring systems. Thus, the Video Contour Projector retains all the robustness and the familiar profile of a traditional optical comparator, while bringing advanced digital measurement technology and automation to the shop floor.
The New Toolmaker’s Microscope
Digital imaging techniques open up many possibilities for easy and accurate measurement for small and even micro parts on the shop floor. The latest generation of digital measuring machines (DMMs) are especially useful for measuring smaller parts. These machines have all the capabilities of vision measurement systems, but are designed to handle small parts that fit in their viewing area—typically about 3-inches diagonal. The better quality DMMs can process and measure the entire field of view instantly using internal video cameras and measuring software. Multiple features or even entire parts can be measured in one snapshot. A range of feature types are handled, including features larger than a single field of view. Feature constructions allow dimensions and locations to be calculated from measured features—something more difficult to do with conventional comparator techniques. Digital zooming allows the displayed image to be magnified for a close-up inspection without increasing the optical magnification and thereby sacrificing viewing area. Panning the image while zoomed enables the user to move about the image area similar to moving along an electronic map on a smart phone or tablet.
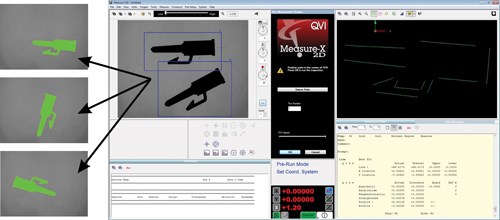
What makes these new DMMs truly shopfloor friendly is their ability to automatically recognize and measure parts with no special staging procedure needed. In other words, the user can simply place a part on the measuring stage and measure by pressing a single button. Digital technology makes this possible. The QVI SNAP uses digital image Autocorrelate to recognize parts in its library and measure them automatically. One or more parts can be placed on the measuring stage in random order and SNAP will recognize, count and measure them with a single button push. If an incorrect part is mixed in with the parts on stage, SNAP will identify the part (if it’s already in the library) and measure it in sequence with the others.
Digital technology continues to make its way into inspection and measuring systems, making them more accurate and easier to use than ever before. Digitally controlled lighting, digital megapixel cameras, digital projection sources and touchscreen technology have each improved the performance and the cost of inspection and measuring systems to keep pace with the needs of production machining operations for fast, reliable and convenient measurement right on the shop floor.
Related Content
How Well do You Know Granite Surface Plates?
Here are some tips for choosing, maintaining and customizing a granite solution that will best meet your shop’s particular inspection needs.
Read MoreAutomated Inspection Transforms Medical Manufacturer’s Quality Control
Manual steps for part inspection have been eliminated with a new CMM process using more advanced software and strategies such as using a combined scanning/touch-trigger probe.
Read MoreShop Finds Value in Simple CMM Programming
Icon-driven programming enables all shopfloor personnel to perform CMM inspection, not just those in the quality department.
Read MoreAddressing Machining’s Necessary Evil
Many view quality control as such, but integrating new measurement technologies and approaches can ultimately minimize QC’s impact on throughput and a company’s bottom line.
Read MoreRead Next
Micro Measuring
Making micro sized parts is one thing; measuring them is another.
Read MoreDo You Have Single Points of Failure?
Plans need to be in place before a catastrophic event occurs.
Read More5 Aspects of PMTS I Appreciate
The three-day edition of the 2025 Precision Machining Technology Show kicks off at the start of April. I’ll be there, and here are some reasons why.
Read More



.jpg;maxWidth=300;quality=90)


