Ensuring Zero-Defect Bores
Here’s how one shop makes certain that every bore meets specs for customers who believe one bad part in a million is one too many.
Today’s cars are a lot safer than the cars our parents drove. That’s partly because of passenger safety features such as air bags, ABS and seat belts—and the fact that those safety products are made to exacting standards to ensure that they’ll work when and if they are needed. Companies that produce the components that go into those safety products must produce them defect-free. One bad part in a million is one bad part too many. Fortunately, those companies are getting a lot of help from equipment manufacturers that are coming up with the machines and systems needed to achieve defect-free parts.
For example, American Turned Products (Erie, Pennsylvania) has been a supplier of parts to the auto industry since the company started in 1984. Automotive parts currently account for about 70 percent of the company’s sales. It has always had bore sizing and finishing capabilities. According to Harry Eighmy, vice president of manufacturing, any company supplying parts to the auto industry must have that capability, especially now more than ever.
“Work is more demanding today than it was 20 years ago,” Mr. Eighmy explains. “As the technology improves, customers want and expect tighter tolerances and better finishes. Tolerances are one-half to one-third what they were 10 years ago.”
Until a few years ago, the company had been using conventional-stroke honing equipment exclusively. However, during a visit to International Metalworking Technology Show, employees saw a demonstration of a single-pass bore-finishing system that uses multiple diamond-coated tools. The multiple-tool system, made by Engis Corporation (Wheeling, Illinois), significantly outperformed the equipment American Turned Products (ATP) had been using. The company bought the machine and had it up and running within 90 days of first seeing it at the show.
The honing equipment that ATP had been using has a rotating hone that reciprocates in and out of the bore, expanding slightly in diameter with each stroke. The “stone,” or honing tool, is made of a fine-grained abrasive that wears slowly, permitting fine control of the bore size and finish.
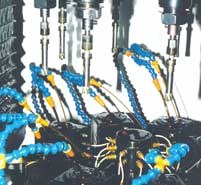
By contrast, the system consists of multiple, solid, cylindrical tools, each slightly larger in diameter and arranged in increasing order of size. Instead of conditioning the (blind or through) hole by means of multiple passes with a single, expandable-diameter tool, the single-pass system conditions the hole using a single pass of each of the progressively larger diameter diamond-coated tools.
Although diamond tooling sounds expensive, it is said to be less expensive than conventional honing tooling. The diamond tooling is not only highly wear-resistant, but that wear is distributed over several tools (as many as eight depending on the application). Accordingly, bore finish is more consistent from part to part, and the machine runs longer between tool changes, resulting in greater throughput.
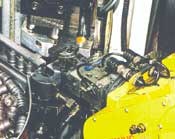
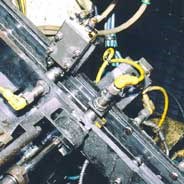
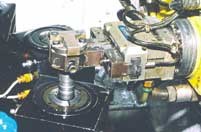
Typically, the part with the bore to be finished is loaded in a fixture on the machine’s turntable. The turntable rotates the part to the first station where the first (smallest diameter) tool makes a single pass. The turntable then indexes the part to the second station where the second, larger diameter tool takes another pass. The turntable continues to index the part until all of the progressively larger diamond-plated tools have taken a pass at the part. Every time the turntable indexes, a bore is processed at each workstation and a finished part is completed.
As is the case with most metalworking processes, the machine is only one factor in the bore-finishing equation. Other factors, such as tooling, fixturing, coolant and part loading/unloading, must also be taken into account to ensure a successful application. Accordingly, Engis representatives are available to customers to help with installation. They visit the customer, examine the intended application and recommend the most productive tooling arrangement, part fixturing arrangement, coolant, part inspection, automation options and more. They also do turnkey installations (commonly done for high-volume jobs) to make them as efficient and as mistake-proof as possible.
Therefore, when ATP received a large order for a 1215-alloy, case-hardened steel, automotive part, it relied on the manufacturer to supply an automated system on a turnkey basis to finish a 1 3/8-inch-deep blind bore in the 1-inch-diameter by 2-inch-long part. The bore had to be accurate within ±0.00045 inch, with a 30-microinch finish.
Most of the parts that the company produces are made from steel and are sent out for heat treating before finishing operations on critical bores. For that reason, its bore-finishing equipment is grouped in one area instead of being combined with production machines, such as multi-spindle cam automatics in dedicated production cells. Currently, the company has two manually operated Engis bore-finishing machines and the automated system developed for the automotive part.
Robot Load/Unload
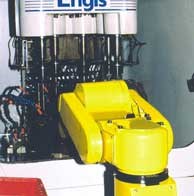
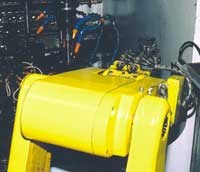
In the automated system, discrete, heat-treated parts are fed to a bowl feeder that positions them in a delivery chute. A compact Fanuc robot, located in what would be the operator’s position in front of the machine but inside an overall enclosure, takes a part from the delivery chute and delivers it to the loading station on the machine’s turntable. For this cylindrical part, the part fixture is a simple collet.
The turntable indexes to present the engine timing part to each of the several tool stations. In this case, the part is presented in turn to six progressively larger, single-pass, diamond-coated, bore-finishing tools. When the part indexes around to the exit station, the robot removes it from the collet and delivers it to a chute leading to a bore gaging station. If the part is within specifications, it passes through the inspection station to the discharge chute and to a basket outside the machine enclosure.
Where the customer requires a ±0.00045 inch tolerance on bore size and a 30-microinch finish, the automated bore-finishing system maintains a much tighter (±0.0001 to 0.0002 inch) tolerance spread and a 10- to 15-microinch finish.
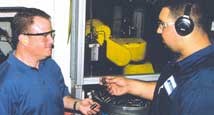
When we visited ATP, the same job was running on the automated single-pass bore-finishing machine and also one of its manually loaded machines. Mr. Eighmy pointed out some of the advantages of the automated machine. “The automation package is not very expensive and only takes up about half again as much space as the manual machine,” he notes. “Cycle time (9 seconds) is the same for both machines. However, the automated machine runs continuously. Our studies have shown that we’re getting a 30 to 40 percent improvement in output with the automated machine.
“Probably the most important consideration is that the automation removes the possibility of human error,” Mr. Eighmy continues. “It ensures that every part will be processed in exactly the same way. That’s the only way we can be sure of achieving zero-defect parts.”
Additional Automated Machines
The importance of the automated bore-processing machine to the company is perhaps best indicated by its plans for more machines. The company has two manual machines, which are used for small jobs and to provide modest part quantities, while ramping up a program. It is planning to retrofit one of the manual machines with an automation package and will also purchase another automated machine, which will be installed alongside the existing machines. The two operators who run the department’s bore-finishing machines will also be responsible for running the fourth machine. That means the company will increase its bore-finishing capacity by about 50 percent with no increase in labor costs.
Related Content
Reinventing the Wheel with Robot-Automated CNC Multitasking
One race team discovers how to efficiently manufacture a new wheel nut design for the next-generation NASCAR stock car with the help of a CNC mill/turn and a built-in robot.
Read MoreAutomated High-Production Welding of EV Rotor Shafts
This cell is able to perform joining, preheating and welding operations for rotor shafts used in electric vehicles.
Read MoreThyssenkrupp Materials Services Opens New Facility in Texas
The new service center in Sinton, Texas supports the materials and supply chain management needs of manufacturing companies across multiple markets in the region.
Read MoreHow Small Machine Shops Can Fight Supply Chain Problems
Supply chain disruptions are still presenting challenges in manufacturing. This article examines the effects on aerospace, automotive and medical industries. It also covers ways that machine shops can be successful securing work despite the challenges created by the supply chain.
Read MoreRead Next
Do You Have Single Points of Failure?
Plans need to be in place before a catastrophic event occurs.
Read MoreA Tooling Workshop Worth a Visit
Marubeni Citizen-Cincom’s tooling and accessory workshop offers a chance to learn more about ancillary devices that can boost machining efficiency and capability.
Read MoreSeeing Automated Workpiece Measurement in Real Time
User-friendly inspection software for CNC machining centers was shown at IMTS 2024 monitoring measurements between and after machining while performing SPC based on recorded measurement values.
Read More




.jpg;maxWidth=300;quality=90)


