Measurement Technologies Step Up to Production Machining Needs
The increasing capabilities of high-production turning equipment such as Swiss machines have also raised expectations for inspection technology. Determining the best solution requires a close look at the application and the needs of the end user.
Advancements in manufacturing equipment such as Swiss screw machines and high-speed CNC milling systems have revolutionized precision part production. Some Swiss screw machine lathes have guideways that hold barstock of lengths as long as 12 feet in steel, polymer and composite materials. Part features are generated by moving the barstock and the cutting tool simultaneously to create the component. This capability has introduced speed advantages and optimized cutting of shapes for higher throughput than ever before. Part accuracy is superb (± 0.00002 in) and part-to-part consistency is drastically improved.
With the evolution of this machinery and its related processes, manufacturers of medium- to high-volume turned parts are facing increased inspection requirements in terms of frequency, feature measurement and production statistics, as well as rising accuracy specifications. Manufacturers are seeking advancements in measurement technology, such as the speed of measurement cycles, the ability to check parts with greater accuracy and the ability to precisely measure geometric features and free-flowing forms.
Metrology technology has come a long way in the last 5 years, and tools are available to meet such exacting inspection requirements. The right solution, of course, depends on the particular needs of the end user. The following information explains three different, but effective, approaches to accurate measurement of turned parts in the medium- to high-volume production environment.
Non-Contact Turned Part Measuring Centers
The dental implant industry is a compelling example of an industry making use of opto-electronic, non-contact measuring systems. Manufacturers are producing many size and shape variations of the core components of a dental implant via turning/thread cutting as performed using CNC turning technology in a high-volume production environment. The implants, also known as prosthetics, are human spare parts, and therefore, quality is of utmost importance; all functional dimensions must be inspected on a 100 percent basis.
The components are very small (typically less than 4 mm in diameter), with many dimensions that are difficult and time-consuming to measure using traditional gaging methods (optical projectors, toolmaker’s microscopes or hand-held tools such as micrometers). With increased levels of production and quality demands, and the variety and volume of components produced with increasing measurement criteria, non-contact measuring systems helped fulfill this industry’s metrology needs.
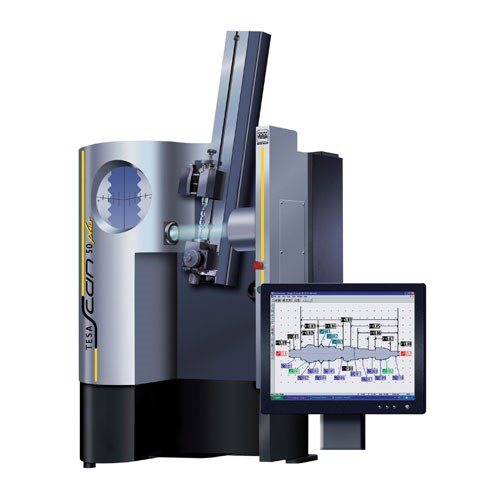
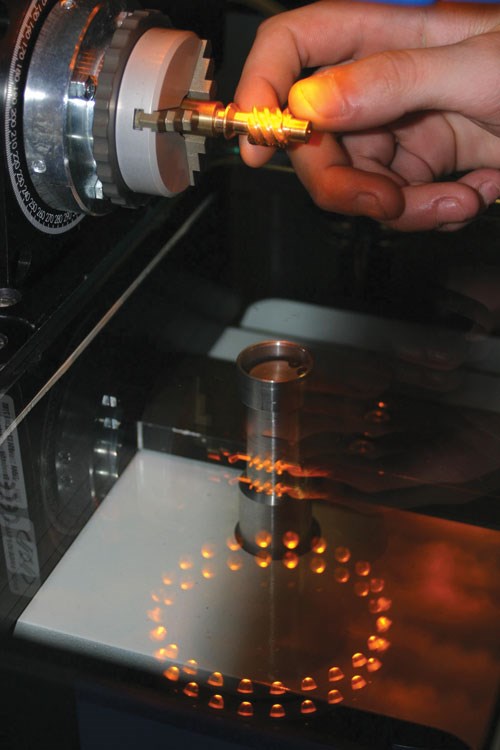
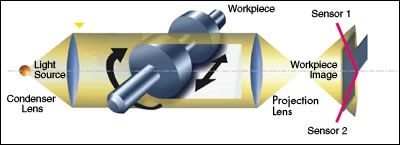
Today, a single non-contact automatic rotary profile measurement device such as a Tesascan 25 from Hexagon Metrology can be dedicated to a cell of two or three CNC lathes producing one product type. The object to be measured is fixed in a rotary mandrel and turns (if required) while a light projects the profile onto a collection sensor array, which digitizes the image. The software then measures the pre-programmed features using the digitized image as a guide. Typical cycle time for 12 dimensions on a part is 28 seconds. Often, production engineers are responsible for part programming, which is performed online and offline, while the operators use the measurement system to automatically inspect the components. CNC operators can check all critical external dimensions with a single piece of equipment. Profile devices such as the Tesascan offer advantages over laser systems in terms of overall accuracy, speed and the types of features that can be measured.
Once each component is measured, the results can be displayed numerically and graphically together, with the ability to analyze measurement data statistically in the form of histograms, control charts and capability reports. This capability, previously impossible with manual methods of inspection, has provided a statistical base for determining process trends and adjustment of individual machine tools. An added bonus is that measurement data is traceable to individual machines using either a batch number or machine tool identification number entered by the operator.
Automatic thread measurement can be accomplished if the machine incorporates a slewing device, which tilts the part for better measurement of machined threads
(helix angle compensation).
Another advantage of this type of tool is scalability. If a shop producing turned parts has the capability for various sized end products, turned part centers can be purchased that will accommodate much larger turned parts (as long as 500 mm and 80 mm in diameter). However, this type of tool has limitations. Generally the tool can only accommodate a single part at a time and must be loaded and unloaded manually, even though the measurement cycle is automatic. If the feature for measurement cannot be seen in profile, such as a machined channel, then it cannot be measured.
Vision Systems
For production machining, one of the most significant benefits attained with vision measurement technology is faster throughput. Using a piston valve automotive application as an example, conventional measuring can take an hour or more to collect only the measurements of the piston valve. That inspection time does not include the data compilation and statistical analysis necessary for many of the components. With the introduction of rapid vision measurement systems, the complete inspection process can be cut down to less than 5 to 10 minutes per part.
A component such as a piston valve also has very exotic shapes and radius blends that require inspection. Once again, vision measurement technology provides an efficient solution. By using profiling calculation tools, the task of measuring complex curves is cut down to a simple profile trace. Supportive CAD referencing capabilities from software such as PC-DMIS Vision add further simplicity. With some quick steps, the CAD model is adjoined to the physical part to enable point-and-click support in measuring the complex profiles. This process is possible for many types of parts such as small medical components with profile tolerances of microns or electronic components with gap and height measurements in the submicron levels.
Many other types of parts are especially useful for vision metrology. Part data is generally collected in seconds and supported by pick-and-place trays that minimize operator handling. Feature location and feature form can be measured from the data acquired. The price range of these systems is normally based on capacity, speed and accuracy, resulting in systems that fit a large spectrum of budgets. A vision system like the Brown & Sharpe Optiv 1 Classic fits an entry level budget. At the other end of the spectrum, a Brown & Sharpe Optiv 3 Performance provides extreme precision with submicron accuracy. Vision metrology can be called the micro metrology tool of the future.
The vision metrology world continues to evolve. The introduction of interactive multiple sensors has revolutionized how 3D measurements can be performed in vision based systems. The various sensors provide the building blocks to expand or enhance a vision system. Tactile systems such as touch probes can hold tolerances down to a couple of microns and provide articulation when necessary. Articulation permits the measurement of features that may not be inline with the vision sensor. Additionally, non-contact sensors such as laser and white light scanning probes can drive precision down to submicron levels and, in some very special cases, angstrom levels of precision. Lasers provide selective support for measurements of form using a real-time rotary or tilt axis. White-light sensor technology is especially useful for certain tiny features such as small steps and 3D forms. The correlation of these sensors in combination with the optical sensor provides an unparalleled benefit for speed and agility of vision systems.
Touch Probe Systems
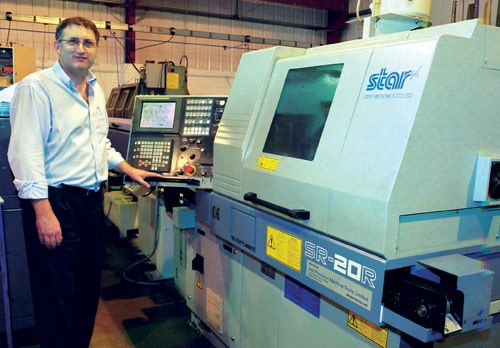
The final solution for production machining offers the highest throughput option and involves incorporating a measurement touch probe on the turning center itself. The following company has reaped the benefits of such a system. Davromatic Precision Ltd. (Rugby, United Kingdom), is a second tier supplier for aerospace, defense and heavy machinery industries. On any given day, the company faces a balancing act as a manufacturer of precision turned parts. On one hand, it needs to produce precisely turned and milled parts with tolerances of only ± 8 microns. On the other hand, it needs to keep costs down to a minimum. The investment in a turn-mill center with an integrated touch probe became an economical choice for the company.
With high volume production, each pause in production and each manual adjustment of the turning center affects the productivity and the profitability of the job. In order to ensure the quality of parts with tight tolerances, and prevent process drift, an integrated metrology solution was needed for permanent monitoring and adjustment of the machining
parameters.
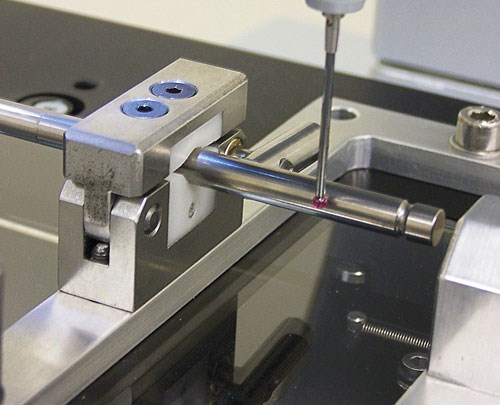
Davromatic implemented a hard-wired infrared touch probe system by M&H Inprocess Messtechnik GmbH that allows the turning lathes with movable heads to inspect turned and milled contours while the part still is on the machine in its counterspindle. The touch probe is mounted on a mounting bracket fixed near the main spindle head in order to move the cutoff workpieces for dimensional measurement to the touch probe by the counterspindle.
Measuring critical dimensions such as the outside diameter, length, width of hexagon cross-sections and milled surfaces is accomplished in seconds. Because the measuring process takes place on the counterspindle, it can be done independently of the main spindle, reducing the impact to production even further.
Davromatic has also realized secondary benefits of the system in terms of monitoring tool wear and premature failure. Some alloys used in production were contributing to inconsistent and uneven tool wear, which caused production to drift out of tolerance quickly. Sampling every part allowed real-time monitoring of this situation so that inserts could be changed before a lot of expensive material was scrapped and production time lost.
Overall, the ability to achieve a 100-percent sampling rate automatically and to do in-process adjustments to the machine tools has enabled Davromatic to increase productivity by approximately 20 percent, while reducing scrap to virtually zero.
This scenario represents an extraordinarily successful result of in-process measuring. However, this technique does have some important limitations. First, since this method employs a touch probe, everything that has to be measured must be able to be touched. Depending on the part, some features may be too small to be touched, or a single size touch probe may not adequately inspect everything that needs to be inspected. Complicated geometry may be beyond the capability of such a system. Second, this method does not represent an independent verification of the part quality. If the machine itself is inaccurate, the results might be suspect. Some quality programs or customers require independent verification of results. One option might be to use a touch probe system to monitor and control production in combination with an offline solution for final verification.
Forward Looking
The good news is that there are now more choices to inspect turned parts, from offline to in-process as well as hybrid solutions incorporating a combination of techniques and equipment. As the manufacturing of cylindrical components continues to evolve and expand, a variety of metrology systems are meeting the quality requirements and the specific budget needs of this industry. Everything from bone screws to valves to plastic components can be measured with confidence and reliability. Today’s manufacturing standards demand speed and accuracy, and the measurement industry is ready to provide a solution. The result can be significant reductions in inspection time and improved process control—both of which contribute heavily to a manufacturer’s bottom line.
— CogniTens brand of Hexagon Metrology
Related Content
The Value of CMM Controller Retrofits
In this case, new controllers for two coordinate measuring machines — one 26 years old — with new programming software offers the possibility to enable multisensor inspection of critical, turned aerospace components.
Read MoreReplace Repetitive Measurement With DIY Robotic Automation
After minimal training, a shop can learn how to use this robotic inspection system configured for a shopfloor application to supersede repetitive, time-consuming, high-mix gaging processes. It can then be redeployed for another application somewhere else in the facility.
Read MoreZoller Event Shines Lights on Shopfloor Connectivity
The company’s open house event highlighted smart manufacturing solutions from CAM to part.
Read MoreIn-Machine Probing Possibilities for VTLs
A manufacturer of vertical turning centers uses a “push/pull” optoelectronic probe with custom bracket to enable its machines to perform effective, in-process measurement of shafts and related automotive components.
Read MoreRead Next
In-Machine Gaging Automates Part Inspection
SPC Innovations' line of in-machine gages may provide an automated solution to some of the issues with post-process inspection.
Read MoreFaster Measurement Of Complex Parts
As workpieces become more and more complex, with numerous critical dimensions that must be correct because they often relate to other features of the part, many of the tried-and-true measurement tools can slow down the production process.
Read MoreA Tooling Workshop Worth a Visit
Marubeni Citizen-Cincom’s tooling and accessory workshop offers a chance to learn more about ancillary devices that can boost machining efficiency and capability.
Read More



.jpg;maxWidth=300;quality=90)


