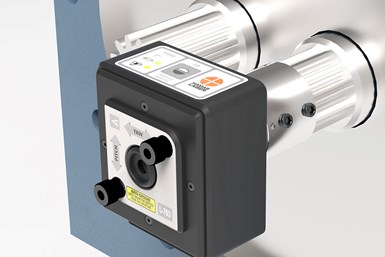
Hamar’s Compact L-703 Bore and Spindle Alignment Laser
Company says compact, versatile design excels at hard-to-align twin-barrel extruders.
Hamar Laser Instruments says its L-703 Bore and Spindle Alignment Laser is a compact, multipurpose laser for many applications, including bore alignment, barrel and cylinder straightness, spindle alignments and hard-to-align twin-barrel extruders.
The company says that one of its overall design goals is to make its lasers smaller and more versatile. While designing the L-703 to replace its L-706 Bore, designers discovered the L-703 solved a long-standing application request for aligning twin-barrel extruders, which led the team to create an alignment package for the L-703.
The L-703 is combined with the company’s self-centering bore-measuring targets for extruders in the L-703 Twin-Barrel Extruder Alignment System kit, which also includes Hamar Laser’s A-703T Spline-Shaft Adapter, A-510 2-Axis Target, bore adapters, readout and accessories. Additional L-703 Laser kits for other applications (including bore and spindle alignment, and surface plate calibration) will roll out later this year.
Customers who already have the L-705 Extruder Borescope Laser for single-barrel extruders can now align twin-barrel extruders by purchasing just the L-703 Laser and A-703T Adapter, and use the rest of the L-705 system components, the company says. Designed specifically for the L-703 Laser, the A-703T Adapter positions the laser on the end of the spline shafts on twins for alignments in tight spaces and features an adjustable centering plate to accurately indicate in-the-center mounting hole to the rotation axis.
It is said the small L-703 Laser solves the space-limitation problem that makes aligning twins difficult. The laser is short, making it easier to use with the typical limited space off the end of the gearbox shaft. This enables the laser to be aligned to the shaft rotation axis so each barrel section can be aligned to a common reference, resulting in much better alignment, the company says. This eliminates errors that come from trying to use the outside of barrel sections to check the alignment, because those may not be parallel to the inside.
Related Content
-
Streamlining Part Measurement, Data Collection Processes
When collecting measurement data automatically with a wireless data collection system, manual errors can be eliminated ensuring data accuracy and traceability.
-
Precision Machining Technology Review: December 2023
Production Machining’s December 2023 technology showcase includes some of the latest technology from Sandvik Coromant, Nikon Metrology, The L.S. Starrett Co., Walter USA, Kennametal and SolidCAM.
-
Addressing Machining’s Necessary Evil
Many view quality control as such, but integrating new measurement technologies and approaches can ultimately minimize QC’s impact on throughput and a company’s bottom line.


