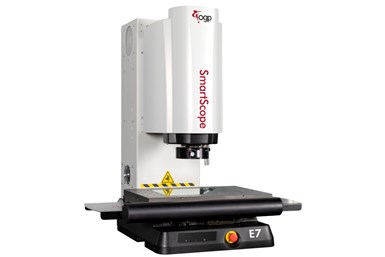
OGP SmartScope E7 Is Fully Automatic Measurement System
The 3D multisensor measurement system features a fixed-lens, IntelliCentric optical system, which is a fully telecentric optical system that provides a super high-resolution image well suited for video edge detection.
Optical Gaging Products’ (OGP) SmartScope E7 is the first in the company’s new SmartScope E-Series family of 3D multisensor measurement systems, offering a fully automatic measurement system for 3-axis video measurement. OGP is a manufacturer of optical and precision multisensor metrology systems for industrial quality control.
OGP has reimagined the trusted SmartScope system to be accessible for all skill levels and budgets. The SmartScope E7 features a fixed-lens, IntelliCentric optical system, which is a fully telecentric optical system that provides a super high-resolution image well suited for video edge detection. The digital zoom enables instantaneous magnification changes, while the standard all-LED lighting system provides illumination from all angles.
The system also features advanced lighting with all LED coaxial, substage profile and SmartRing light illumination coming standard. The company says it has a sturdy, stable construction with a heavy-duty cast base and integral compound stage with Y-axis center drive providing stability. It also offers multisensor versatility with optional TP-20 and TP-200 touch probes.
“The combination of an innovative optical design, advanced camera technology and proprietary OGP image processing allows SmartScope E7 to have the same feature size range as other mechanical zoom optical systems, but with no moving parts,” says Colby Finn, vice president, QVI Marketing. “The engineering behind this machine has produced significantly better optical performance at low zoom, with better image quality, telecentricity and distortion free imaging.”
Related Content
-
How Well do You Know Granite Surface Plates?
Here are some tips for choosing, maintaining and customizing a granite solution that will best meet your shop’s particular inspection needs.
-
Keeping Watch on Small Parts
From watch parts to exotic medical applications, this shop takes on the world of micromachining.
-
Streamlining Part Measurement, Data Collection Processes
When collecting measurement data automatically with a wireless data collection system, manual errors can be eliminated ensuring data accuracy and traceability.


.jpg;maxWidth=300;quality=90)
