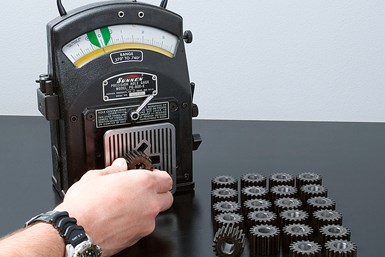
Sunnen Offers Mechanical Bore Gage Leasing Program
The company says the lease program is an easy, economical way for job shops to get in-line precision part inspection, increasing shop capabilities and opening new avenues of business.

The Sunnen lease program includes maintenance and provides replacement gages, if needed.
Sunnen’s PG-700/800 Series bore gages are well suited for fast, simple, economical process control in lean manufacturing environments, combining accuracy with a shop-hardened, all-mechanical design, the company says. And the company’s leasing program enables shops of all sizes and production runs to have this precision in-line measurement for parts that are honed, ground, bored, reamed or drilled.
The lease program includes maintenance and provides replacement gages, if needed. The PG-400 and PG-500 setting fixtures can also be leased to complement the PG gages. The lease renews each year and, if the gage is no longer needed at the shop, it is simply returned to Sunnen. If a gage needs to be repaired during the lease, it is quickly swapped out for another unit.
The PG-Series gages are said to offer ID gaging on the manufacturing floor with no need for electrical or air connections, making them immune to fluctuations in line voltage or air pressure. A single PG gage can measure a range of part diameters, offering more versatility than dedicated devices, such as air gages, according to the company.
Compact and portable, the gages can be mounted at machining stations. Gage setting fixtures enable a two-minute setup, while eliminating the need and expense for plug gages, jo blocks, master rings or micrometers.
Unites are available with two different scales to fit the application — 0.005" range with 0.00005" increments or 0.010" range with 0.0001" increments. Various models are available for gaging IDs from 0.090" to 2.900". Metric models cover IDs from 2.3 mm to 74.3 mm.
These bore gages can be used to examine the entire bore for diameter, taper, barrel, bell mouth, out-of-round and lobing. A sliding faceplate with adjustable stops permits end-to-end bore examination. Stops can be set to enable examination of a particular section of the bore, with accuracy right up to the edge of ports, lands and ends.
Related Content
-
Addressing Machining’s Necessary Evil
Many view quality control as such, but integrating new measurement technologies and approaches can ultimately minimize QC’s impact on throughput and a company’s bottom line.
-
Zoller Event Shines Lights on Shopfloor Connectivity
The company’s open house event highlighted smart manufacturing solutions from CAM to part.
-
The Advantages of Automated Shopfloor Gaging
This “parallel kinematic” gage offers the opportunity to automate and improve machining process control for shops endeavoring to move from sample inspection to 100% inspection.


