How to Choose and Use Styli
The variety of probe applications on machine tools, CMMs, comparative gages and portable arms makes correct selection of styli usage essential for efficient, reliable and accurate measurement. Here are some key points that can be helpful in choosing the best measurement solution.
In metrology, a stylus is mounted to such probes as kinematic, strain gage and scanning, and acts as the point of contact with the workpiece. The variety of probe applications on machine tools, CMMs, comparative gages and portable arms makes correct selection of styli usage essential for efficient, reliable and accurate measurement. Here are some key points that can be helpful in choosing the best measurement solution.
For traditional kinematic inspection probes used on machine tools, ceramic stems and ruby ball styli are the first choice. For CMMs, steel and tungsten carbide are fine for shorter stems, while ceramic or carbon fiber are better for longer stems. Ceramic stems are lighter than tungsten carbide, have stiffness comparable with steel, and are thermally stable—ideal for use in a machining environment.
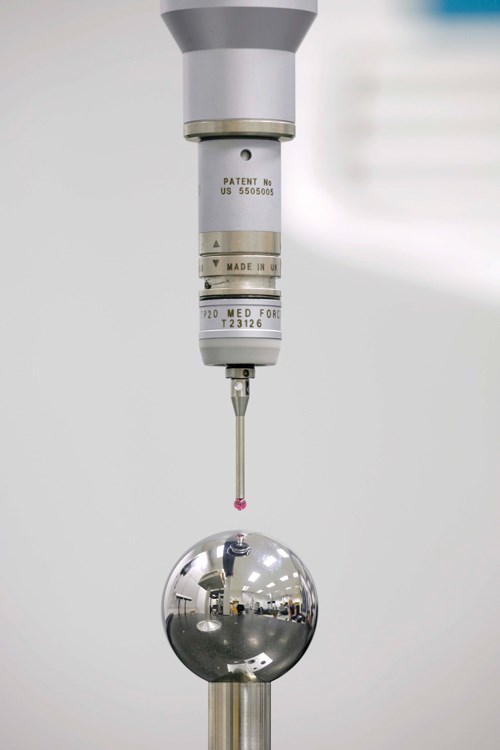
Ruby balls are exceptionally hard and smooth, with excellent compressive strength and resistance to abrasion. They are manufactured to various levels of precision defined by their grade, which relates to the maximum deviation of the ball from a perfect sphere. Any error in sphericity will increase measurement uncertainty. The two most commonly used ball grades are 5 and 10 (the lower number is better). The more accurate the CMM, the more significant the effect of ball grade. Renishaw recommends grade 5 as standard and offers grade 3 (with sphericity of only 0.08 micron) for the most demanding applications.
For high accuracy strain gage probes, particularly those used on machine tools, carbon fiber styli are recommended. These styli, whether hollow or solid, have low mass, making them best suited for sensitive strain gage probes. Carbon fiber is the most common material for long styli and extensions because it is stiff, light and thermally stable. Where metal is needed—for joints, knuckles, and so on—titanium provides the best combination of light weight, strength, stability and density.
Styli for portable arm CMMs must be robust, so they use grade 5 zirconia balls that are highly fracture resistant. The balls are bonded to high-strength tungsten carbide stems using impact resistant adhesive, and special construction ensures the joint is rigid and virtually indestructible.
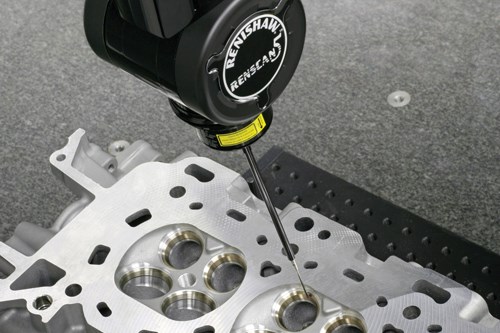
Scanning probes, such as Renishaw’s SP25M used on CMMs and the Equator Flexible Gage, introduce variables that affect the choice of ball materials. Scanning produces more aggressive surface interaction than touch probing, resulting in three issues: debris accumulation, adhesive wear and abrasive wear. Debris is unavoidable, but easily removed with a dry, lint-free cloth. Adhesive wear involves permanent transfer of workpiece material to the ball. This condition eventually degrades the sphericity of the ball. Abrasive wear removes material from the ball or workpiece.
The ruby ball is best for most scanning applications, including stainless and titanium workpieces, but it can suffer adhesive wear on aluminum under extreme conditions. Silicon nitride is a substitute for ruby in extreme aluminum applications, but it can suffer abrasive wear on stainless steel or cast iron. Zirconia balls are best for scanning cast iron parts, though tungsten carbide performs well also.
Variety of Stylus Types
Straight styli are typically used for simple features where the probe directly contacts the part. However, many alternatives are available for specialized applications:
Star: Multi-tip star styli allow efficient inspection of extreme points of internal features, such as slides or grooves in a bore, minimizing probe movement.
Pointer: These styli are ideal for probing threaded forms, specific points and scribed lines, though they are not appropriate for standard X-Y probing. Radius-end pointer styli can be used to inspect the location of very small holes.
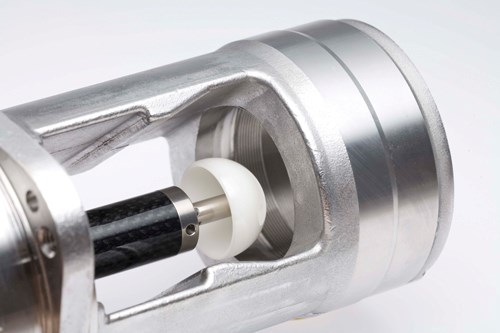
Ceramic Hollow Ball: These large styli are ideal for probing deep features and bores in X, Y and Z directions. Probing with a ball stylus averages out the effect of very rough surfaces.
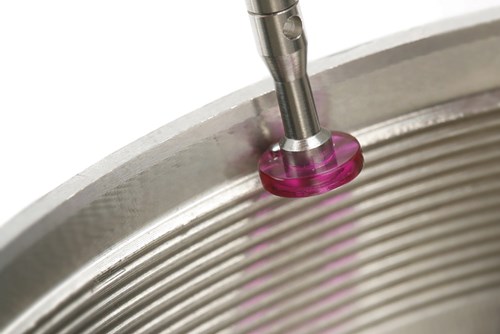
Disc: Discs are ideal for probing undercuts and grooves. Thinner discs require careful angular alignment to ensure correct contact with the part feature. A simple disc requires datuming on only one diameter (usually with a ring gage), but limits effective probing to only X and Y directions. Adding a radius-end roller allows Z-direction probing, providing the center of the radius end roller extends beyond the probe’s diameter.
Cylinder: These are ideal for probing holes in thin material and threaded features and for locating the center of tapped holes. The spherical end allows full qualification and probing in X, Y and Z directions.
Custom Designs: Custom styli are also available for specific applications.
Basic Application Rules
A few simple rules for stylus use can maximize accuracy for most probing applications:
- Keep styli short and stiff. The minimum stylus length gives optimum results. A longer stylus amplifies errors and introduces the potential for excessive bending.
- Minimize the number of joints. Joints and extensions introduce potential bending and deflection points.
- Use a thick stem. Thicker stems increase the stiffness of the stylus.
- Keep the stylus ball as large as possible. This strategy reduces the chance of false triggers caused by the stem contacting the part. A larger ball increases effective probe length and allows a larger stem diameter, increasing the stiffness of the stylus. Finally, the larger ruby ball reduces the influence of a part’s surface finish on measurements.
Deceptively Simple … But Not
Despite their apparent simplicity, a great deal of science—and certainly exceptional precision—goes into the materials, designs and manufacturing techniques used to produce styli. Whether it’s the method of attaching the ball to the stem, or the materials selected, the simple stylus is anything but simple.
Related Content
Addressing Machining’s Necessary Evil
Many view quality control as such, but integrating new measurement technologies and approaches can ultimately minimize QC’s impact on throughput and a company’s bottom line.
Read MoreKeeping Watch on Small Parts
From watch parts to exotic medical applications, this shop takes on the world of micromachining.
Read MoreThe Advantages of Automated Shopfloor Gaging
This “parallel kinematic” gage offers the opportunity to automate and improve machining process control for shops endeavoring to move from sample inspection to 100% inspection.
Read MoreAutomated Inspection Transforms Medical Manufacturer’s Quality Control
Manual steps for part inspection have been eliminated with a new CMM process using more advanced software and strategies such as using a combined scanning/touch-trigger probe.
Read MoreRead Next
Shop Gains Process Control with Automation
Eliminating variability from the manufacturing flow is a goal for most shops. Automation can allow reallocation of resources to accomplish this.
Read MoreEmerging Leaders Nominations Now Open
Here’s your chance to highlight a young person in your manufacturing business who is on the path to be a future leader moving your company forward.
Read MoreDo You Have Single Points of Failure?
Plans need to be in place before a catastrophic event occurs.
Read More





.jpg;maxWidth=300;quality=90)



.jpg;maxWidth=970;quality=90)