Industry 4.0 Through Metrology's Eyes
High precision 3D laser and CT scanning bring all the “big data” directly from shop floor to top floor.
Industry 4.0. Big data. The Internet of Things (IoT). All of these phrases have been bantered around the last few years. But what do they really mean? And how might they impact manufacturing businesses on a daily basis? As a metrology company, Exact Metrology gives different answers to these questions. Here are some thoughts on the growing interconnection between the shop floor and the top floor from co-owners of the company.
Production management has always relied on data as its driver. Whether at a large OEM, a contract manufacturer or a job shop, there has always been a need to review the production information. From analyzing the piece part consistency across a batch run to the taking CMM measurements and comparing part dimensions with the drawing or CAD file, production management has always been a necessary and vital component of the machine tool world.
In the past, adjustments on the machine tool were made by master craftsmen with handwheels, then NC punch tapes through a DRO, and now the CNC. Until only a decade ago at most shops, the production data would be read and compared with the design. Then the manager would jump out of his chair, run into the shop and stop the machine operator, bringing along the programmer to reset the parameters, check the tooling, recalibrate the zero point, load the next blank and hit cycle start. Meanwhile, a lot of product went into the scrap bin. But in today’s competitive and highly automated machine shop, this reads like ancient history.
The last decade has seen everything from the emergence of PLM software to the latest CNC, which can integrate all the data in both directions and make the instant algorithmic adjustments to the cutting parameters of the cycle. CNC keeps production as consistent as possible, taking into account all the tool data, thermal expansion and machine kinematic information, because it all impacts product quality.
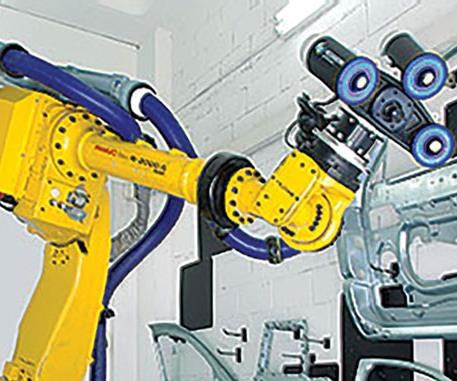
Enter metrology. This idea, for those who don’t know the term well, refers to the systematic and highly precise gathering of data in time and space. A part can be fixtured, scanned and swapped out on a worktable next to the machine or, in the most advanced production machining centers, in-process on the machine tool’s worktable, using highly controlled robots for both part articulation and probing. Today’s CNC can run these robotics on a second channel of the control, from a remote pendant.
All these data points, which are gathered by the reflection of the light beam and captured in the scanner software, can be instantly sent through a communication bus to a host computer in the QC department. There, the points are compared with the CAD file; the CAM file is recalculated or the CNC can do it on the machine in-process, and the machine makes the next part to the correct spec, altering the cutting parameters to offset the thermal or tool wear conditions or the machine kinematics.
The industrial CT scanner where the part is examined is the latest in metrology advancements. The data points render an image that resembles a medical CT scan. By examining the internal conformation of a part, additional data can be gathered on why an identical tool might make a radically different impact on a material surface. Information overload? Not at 38,000 feet, with a turbine blade in a jet engine.
Industry 4.0, to encapsulate the concept, seeks to fundamentally alter the interaction between worker and machine. The integration of manufacturing, IT and cybersystems, including security, plays an evolving role at all types of machine shops.
Metrology doesn’t seek to alter the data; rather, it seeks to enhance it, speed its collection and, most importantly, reduce and eventually eliminate the scrap and downtime in a process by gathering the information and acting upon its significance in the most effective, efficient manner.
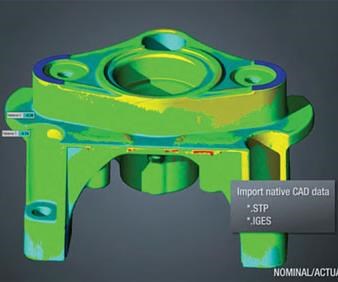
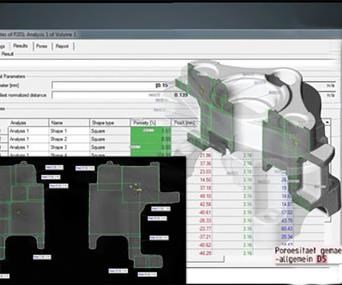
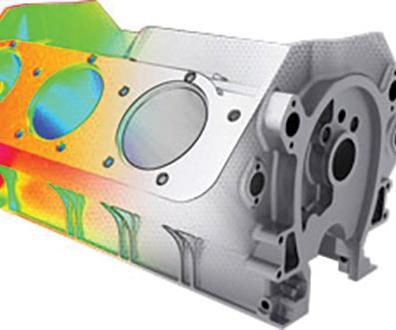
The 3D scan of an engine block shown in Figure 1 can produce a dense point analysis for comparison of an “as machined” image to the pristine “as designed” CAD file. The scanning software can also render what is called 3D CAD comparison and deviation plot, which are significant steps up from the CMM or optical gage capability. Conventional first-article inspection reports are also a possible output from the scanning software technology today. Using the latter, also known as a 3D color map, immediately visualizes the scanned object against the nominal design and is available almost immediately post-scan.
Over time, SPC data can be developed as color maps or simply detailed, tabular data to track machine performance in a preventive or predictive maintenance mode, as well as for OEE indexing.
Scanning modes vary:
Laser scanners are typically mounted on a robotic armature with an optical scanning system. They can work in an area up to 18 feet in diameter and produce data at a rate of almost 500,000 points per second.
White/blue light scanners, mounted on a tripod or robot, capture more than 18 million points per second. In a single shot, white light scanning can take measurements in an area from less than a square inch to several square feet.
CT scanning allows the measurement of parts’ internal structures by generating a voxel cloud from a number of 2D X-ray pictures, which can be converted to point cloud data.
Resolution on all these technologies is as tight as 0.0005 inch. Combined with the accuracy, which rivals all current CMM technologies, laser and white light scanning are perfect for micro parts to large machined parts. When the advantages of a portable CMM (PCMM) are needed, the laser scanner is simply replaced with a touch probe on the robot arm with optical trackers. This gives the shop the benefits of both high density scanning and high precision point measurement on the same part.
As manufacturing transitions from the open cloud to the closed cloud, the protection of the shop’s intellectual property will be vital. Those in the metrology business remain watchful for the trends in this area and hope to respond with the proper safeguards.
Related Content
The Advantages of Automated Shopfloor Gaging
This “parallel kinematic” gage offers the opportunity to automate and improve machining process control for shops endeavoring to move from sample inspection to 100% inspection.
Read MoreAddressing Machining’s Necessary Evil
Many view quality control as such, but integrating new measurement technologies and approaches can ultimately minimize QC’s impact on throughput and a company’s bottom line.
Read MoreZoller Event Shines Lights on Shopfloor Connectivity
The company’s open house event highlighted smart manufacturing solutions from CAM to part.
Read MoreKeeping Watch on Small Parts
From watch parts to exotic medical applications, this shop takes on the world of micromachining.
Read MoreRead Next
Examining Non-Contact Inspection for Small Part, High Volume Production
This article looks at current video measurement options for precision measurement.
Read MoreDo You Have Single Points of Failure?
Plans need to be in place before a catastrophic event occurs.
Read MoreEmerging Leaders Nominations Now Open
Here’s your chance to highlight a young person in your manufacturing business who is on the path to be a future leader moving your company forward.
Read More

