Cobots Gain Ability to Sort and Measure
New tooling that includes a precision robotic caliper extends the applicability of collaborative robots to perform sorting and measuring small parts.
Innovations in end-of-arm tooling for collaborative robots (cobots), including the introduction of small, precise and lightweight robotic calipers, is now bringing the benefits of cobots into the quality control (QC) lab. The Q-Span System from New Scale Robotics automates small part measurements, relieving human operators from this tedious manual task, while improving repeatability and reliability.
Three recent innovations have made automation for sorting and measurement possible:
1. Precision robotic calipers.
2. Smaller, lighter weight grippers.
3. A system that enables multiple calipers and grippers to be mounted on a single cobot and controlled by one program.
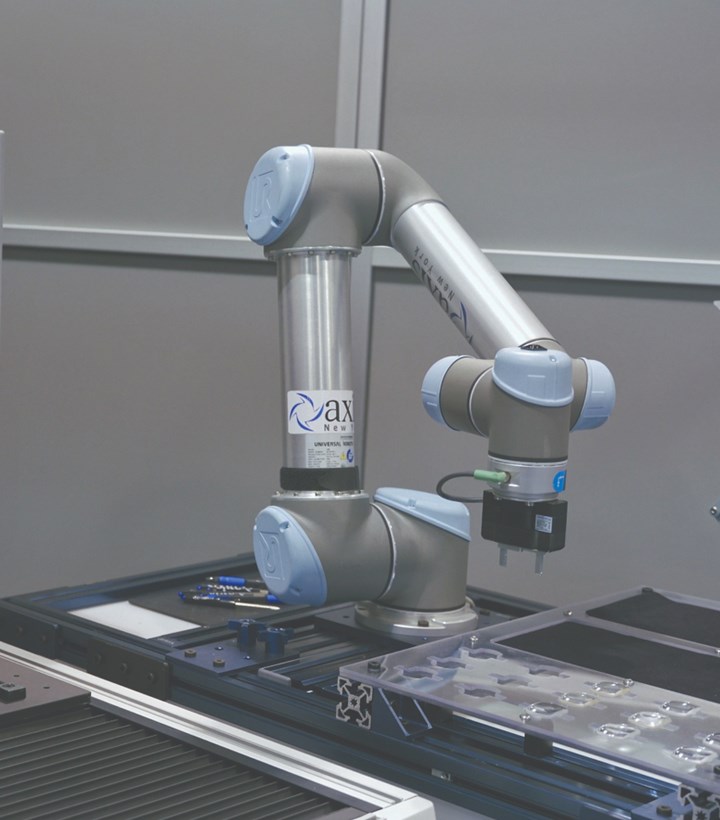
New Scale Robotics has brought these three innovations together and paired them with a UR3e cobot from Universal Robots to create the dedicated Q-Scan System for automated, small part QC measurement. This device can automatically pick parts, measure multiple dimensions on each and make real-time decisions based on the results. It can then sort parts into output trays and send all measurement data to a computer for later analysis.

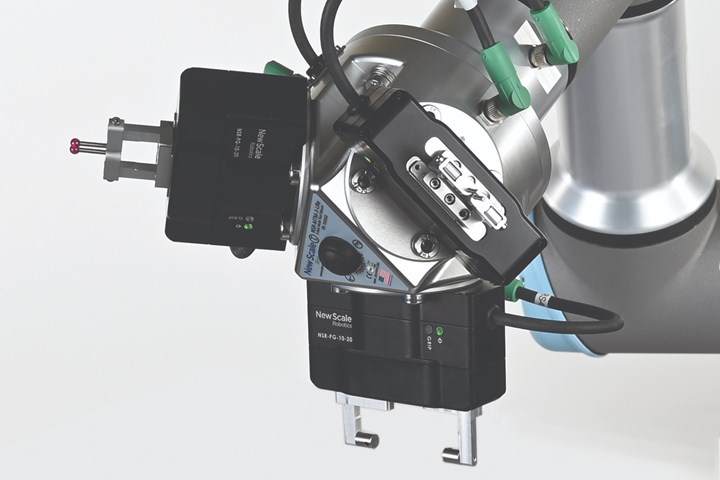
Precision robotic calipers also function as small, lightweight grippers. Here, three are mounted on a single cobot arm using a mount and software to control picking, measuring, data recording and placing. (Photo credits: New Scale Robotics.)
A typical Q-Span System has one robotic gripper for part handling and one or two robotic calipers to make measurements. In many cases, one tool serves as both gripper and caliper. Each caliper is equipped with metrology fingers specific to the part and the dimension to be measured. Dimensions that can be measured include length, width, thickness, outer diameter (OD) and inner diameter (ID).
Because they are small and lightweight, three of these devices can be mounted on Universal Robot’s smallest cobot. This enables the system to occupy minimal lab space and perform multiple processes with fewer large moves.
The gripper/caliper replaces a manual digital caliper and has about twice the precision, according to New Scale Robotics. When using the appropriate jaws and established metrology practices, part measurement resolution is 0.0001 inch (2.5 microns). The +/- 3 sigma repeatability and accuracy are less than +/- 0.0002 inch (5 microns) and +/- 0.0006 inch (15 microns), respectively.
Once the Q-Span System is taught the proper force, position and orientations needed to make precise measurements, it can repeat the procedures indefinitely and continue to operate lights-out. It can be taught procedures for many different parts, and changeover from one part to another can be accomplished in less than an hour.
Based on labor savings alone, a Q-Span System with Universal Robot installation has an average return on investment of less than 11 months, according to the company.
Robotic Tending of CMMs
Now, a cobot can also be used to automatically load and unload a coordinate measuring machine (CMM) with the use of the Q-Span System. The device can be configured with one robotic caliper tool that both picks and measures the

A Q-Span System with one gripper/caliper on a cobot enables “smart” machine tending of a CMM. The gripper/caliper makes preliminary measurements of parts before placing them in the machine.
part. The caliper measurements are used to increase throughput and use of the CMM. If the preliminary diameter measurement is within range, the Q-Span System loads the part into the CMM. If it is out of range, the system can place the part directly into a “fail” output tray and avoid wasting CMM cycles.
After a part is loaded onto a CMM, it uses the Q-Span System’s measurement to determine which inspection routine to perform. It runs its full routine and sends its data back to the Q-Span System, which unloads the part and places it into the appropriate output tray (pass/fail).
New Scale Robotics also offers Q-Scan workstations that are expandable to include measuring instruments and tools with higher precision. These workstations can incorporate other gages with digital output that measure a variety of part features, including height, depth, OD and ID. Linear variable differential transformer (LVDT) height gages, laser height gages, 2D laser scanners, air gages and mechanical snap gages are examples of other instruments with digital output that can be included in the workstation.
Related Content
Reinventing the Wheel with Robot-Automated CNC Multitasking
One race team discovers how to efficiently manufacture a new wheel nut design for the next-generation NASCAR stock car with the help of a CNC mill/turn and a built-in robot.
Read MoreZoller Event Shines Lights on Shopfloor Connectivity
The company’s open house event highlighted smart manufacturing solutions from CAM to part.
Read MoreTips for Troubleshooting and Repairing Chip Conveyors
A nonfunctioning chip conveyor can cause a high-production machine to be down for an extended period of time. Here is some troubleshooting advice if you’re having issues with your chip conveyors.
Read MoreJob Shop Discovers and Fills a Fishing Need
The promise of a product line for improved mounting of electronic fish finders led this Missouri job shop to an automated turning process.
Read MoreRead Next
Collaborative Robots for DIY Automation
Next-generation, new-generation, co-worker — call it whatever; there is a robotics revolution rolling into manufacturing, warehousing, materials handling and supply chains worldwide.
Read MoreA Tooling Workshop Worth a Visit
Marubeni Citizen-Cincom’s tooling and accessory workshop offers a chance to learn more about ancillary devices that can boost machining efficiency and capability.
Read More5 Aspects of PMTS I Appreciate
The three-day edition of the 2025 Precision Machining Technology Show kicks off at the start of April. I’ll be there, and here are some reasons why.
Read More


.jpg;maxWidth=300;quality=90)


