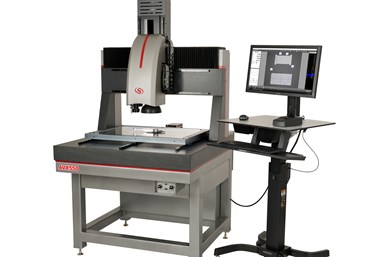
This vision system is equipped with dual optical systems and touch-probe capability to measure parts with a range of feature sizes and geometries. Photo Credits: The L.S. Starrett Co.
Ensuring that stringent medical part quality specifications are met is challenging. Vision systems that offer a variety of options can help in this regard while speeding part measurement routines. However, this can make it arduous for shops to select the right vision system to meet their specific needs.
With the right vision system for an application, machine shops that produce medical parts can use this type of measurement and inspection technology to be confident in the quality of their final product. The L.S. Starrett Co., manufacturer of vision systems and other metrology equipment, suggests three steps shops should take to select the right vision system to meet their needs. CW Moran, marketing specialist, Metrology Division at The L.S. Starrett Co., has provided the information for this article.
First, shops should identify the range of parts requiring quality control and their corresponding requirements. Medical part specifications are often tight, requiring precise dimensions, printed documentation and part number tracing. Identifying these specs upfront helps to streamline the next step in the process.
Second, it’s important to consult with an experienced metrology system supplier that offers the latest vision system technology. Working with highly reflective finishes, complex curves, unique thread specifications and micro-etching are some realities of the medical device industry. Coordinating with a supplier that is knowledgeable about these distinctive challenges can help in selecting the right configurations with the proper lens, lighting, software and accessory options.
Proper setup of the vision system on a shop floor or quality control lab is also key. A reputable supplier works closely with its customers regarding installation and training during system integration on a shop floor. Providing ongoing technical support, either virtual or in person, for the lifetime of the vision system is critical as well. This may include help with annual calibration to ensure the system is operating consistently and reliably.
Third, shops should be aware of various vision system options. Today’s vision systems offer a range of capabilities which may be available as standard or can be configured for a customized system. A metrology system provider can guide users to choose the best options and functionality for an application. Here are a few to consider.
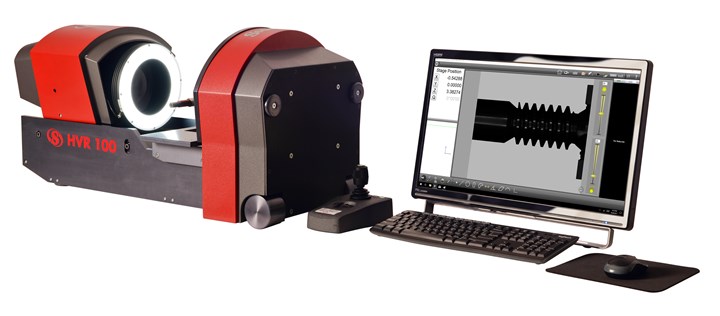
This large field-of-vision (FOV) benchtop vision measurement system — which is capable of being used in either a vertical or horizontal orientation — features a high-resolution digital video camera and minimal optical distortion for accurate FOV measurements of up to 90 mm (3.65").
Benchtop or floor-standing systems. Tabletop microscopes, horizontal and/or vertical view tabletop systems, and floor-standing models in horizontal or vertical viewing orientation are available.
CNC functionality. CNC is available as an option on almost every vision system. It can be used independently or in coordination with a touch probe to ensure the desired measurements are being taken at the exact point consistently.
Optical components. For most modern vision systems, taking measurement points in the Z axis is a standard feature or offered as an option. When combined with high-magnification optics, the system can capture numerous accurate data points in all three dimensions.
New multisensor measurement platforms may be equipped with dual optical systems that work in tandem to enable measurement of a range of features with one single device. A primary zoom lens enables small, intricate features to be inspected with high precision and resolution down to 2 microns. A range of zoom options also means that measurement configurations can be custom tailored to meet the specific application requirements for each user and enables companies to have only one metrology system without the need to change lenses or recalibrate the unit.
Touch probes. This capability increases the versatility of vision systems by providing an additional layer of tactile inspection, enabling the capture of discrete points on a part’s profile to be built into the inspection process as programmable steps. Discrete points that can be hard for a vision process to “see” can be accurately measured with the touch probe sensor by traveling into recessed spaces and measuring the required points.
Lighting. Good lighting ensures that highly reflective surfaces found on many medical devices do not interfere with obtaining accurate results. All lighting systems on vision systems can be adjusted for intensity, depending on the specific needs for measuring a part. Light levels can be integrated into the inspection process as programmable steps.
Camera. Customizable camera features have been developed to handle the challenges of intricate part inspection. Zoom lenses can produce up to 310X magnification on the monitor. Telecentric optics come in an array of lens
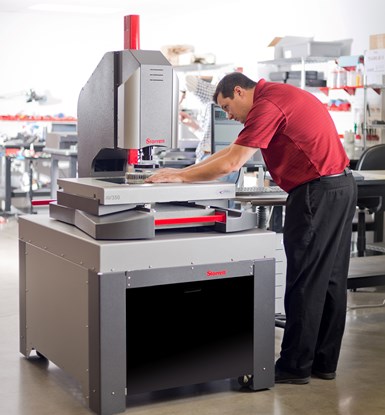
The walkup metrology process enables any employee to initiate a software program for a measurement system and instantly obtain consistent results after a part profile is created.
options from 0.14X to 4.00X. Systems such as the Starrett AVX550 which can be equipped with telecentric and zoom optics. This enables intricate part details and larger features to be inspected without changing lenses or recalibrating. In addition, the Starrett AVR-FOV comes equipped with a dedicated 2.3-inches by 1.9-inches field of view.
Software. Software can enhance the capabilities of a vision system, enabling part recognition profiles to be created based on a few key points of a component’s profile. Once this profile has been created, another part or multiple parts can be placed in the camera’s field of view to initiate the part recognition profile. The camera looks for specific part features to measure and automatically runs the preferred measurements, generating a report in seconds.
Accessories. Accessories — which include fixtures, vises and rotary indexers — can assist with proper part orientation. A rotary indexer is recommended for controlled rotation of a part while maintaining position, such as when a user is inspecting the leading edge of a bone screw thread.
Related Content
In-Machine Probing Possibilities for VTLs
A manufacturer of vertical turning centers uses a “push/pull” optoelectronic probe with custom bracket to enable its machines to perform effective, in-process measurement of shafts and related automotive components.
Read MorePMTS 2023 Product Preview: Measurement
Learn about some of the latest measurement solutions that will be on display at PMTS 2023.
Read MoreReplace Repetitive Measurement With DIY Robotic Automation
After minimal training, a shop can learn how to use this robotic inspection system configured for a shopfloor application to supersede repetitive, time-consuming, high-mix gaging processes. It can then be redeployed for another application somewhere else in the facility.
Read MoreShop Finds Value in Simple CMM Programming
Icon-driven programming enables all shopfloor personnel to perform CMM inspection, not just those in the quality department.
Read MoreRead Next
Inspection System Helps Company Meet Short Lead Times
A digital video inspection system from Starrett is increasing this company’s inspection throughput and helping it get parts to its customer on time.
Read MoreAutomated Inspection on the Shop Floor
Most machine shops understand the value of automation when it is applied to such operations as turning, milling and grinding.
Read MoreBig Visions for Micro Parts
Micromachined parts place unique demands on dimensional measurement systems. It pays to know the most effective approach for a given application.
Read More


.png;maxWidth=300;quality=90)


